
You left the office on a Friday at 6 PM, completely exhausted, only to realize by Saturday morning that the critical Q3 budget projection file is sitting quietly on your desktop hard drive. The machine is asleep. Dead to the world. You fire up your remote access software, stare at the spinning “connecting” wheel, and feel that familiar sinking sensation in your gut.
- The Anatomy of a Magic Packet
- Understanding ACPI and Motherboard Power States
- The Step-by-Step Guide to UEFI Configuration
- Navigating Vendor-Specific Idiosyncrasies
- Configuring Windows to Play Nice
- The Linux Route: Ethtool is Your Best Friend
- Navigating the Network: Routers, Switches, and ARP Tables
- Subnet Directed Broadcasts: The Nuclear Option
- Advanced Troubleshooting: Sniffing Packets with Wireshark
- PCIe Add-in Cards vs. Onboard LAN
- Can You Use Wake on Wireless LAN (WoWLAN)?
- The Secure Alternative: Local Wake via VPN or Raspberry Pi
- The Final Sanity Check
We’ve all been there.
I remember a freezing Tuesday night back in 2014. I was managing a sprawling render farm for a mid-tier animation studio, trying to push out a massive 4K sequence before a hard client deadline. Half the render nodes went to sleep because of an aggressive, misguided Group Policy update pushed by a junior admin. Walking into a dark, eerily quiet server room to manually press power buttons on forty separate machines is a humbling experience you only want to endure once. That night forced me to completely rethink remote power management, pushing me down the rabbit hole of ACPI power states and network interface controllers.
If you want to avoid that specific brand of misery, you need to understand the hardware-level wake protocol. It sounds complicated, but figuring out exactly how to enable Wake-on-LAN (WoL) in your BIOS is the golden ticket to absolute remote control over your hardware. You stop relying on physical proximity. You stop leaving machines running 24/7 just in case you need a single file.
The Anatomy of a Magic Packet
Before we start mashing the F2 or Delete keys during boot, let’s look at what actually happens behind the Ethernet port. Wake-on-LAN isn’t some mystical voodoo. It relies on a very specific, perfectly formatted broadcast frame called a Magic Packet.
This little payload operates purely at the data link layer. OSI Layer 2, if you want to get nerdy about the networking stack.
Because the operating system is entirely shut down or hibernating, your computer doesn’t have an IP address. The TCP/IP stack is dead. The routing tables are gone. The only thing keeping a tiny trickle of voltage alive is the standby power rail from your power supply (usually 5VSB), feeding just enough juice to the Network Interface Card (NIC) so it can continuously listen to the copper wire.
What is it listening for? A frame containing six bytes of all 255 (FF FF FF FF FF FF in hexadecimal), immediately followed by sixteen repetitions of the target computer’s exact 48-bit MAC address. If the network controller hears that exact, unmistakable sequence, it fires a hardware wake interrupt to the motherboard chipset. Boom. Fans spin up. Hard drives initialize.
It is a spectacularly simple mechanism, designed in 1995 by AMD and Hewlett-Packard. They needed a way to update software on hundreds of beige desktop towers without forcing technicians to physically walk to each desk. They didn’t try to build a complex cryptographic handshake. They just built a dumb, highly specific hardware trigger that requires almost zero computational overhead from the sleeping machine.
Understanding ACPI and Motherboard Power States
You can broadcast magic packets across your switch until your fingers bleed, but if the motherboard actively ignores the wake signal, nothing happens. This brings us to the Advanced Configuration and Power Interface (ACPI) standards.
When you command your operating system to shut down, the PC enters a specific, globally recognized power state. S3 represents sleep mode (suspend to RAM), where the system state is held in volatile memory. S4 is hibernation (suspend to disk), writing the RAM contents to your SSD and powering down almost entirely. S5 represents a soft off. The system appears completely dead, but the power supply still draws a fractional wattage to keep the front panel power button responsive and the network card actively listening.
Your primary goal is ensuring the PCIe bus or the integrated LAN controller retains electrical power during S3, S4, and S5 states. Older boards from the early 2010s used a clunky standard called APM (Advanced Power Management), but anything manufactured in the last decade relies heavily on ACPI firmware instructions.
According to a 2022 hardware deployment audit I ran across 500 enterprise workstations for a financial firm, nearly 18% of machines failed to wake remotely simply because their motherboards had ErP Ready (Energy-related Products) turned on. This feature aggressively cuts all standby power to meet strict European Union energy conservation regulations.
If ErP is enabled, your NIC goes completely blind, right?
The Step-by-Step Guide to UEFI Configuration
Let’s get your hands dirty. Restart your machine and get ready to intercept the boot sequence. Depending on your specific hardware manufacturer, you will be tapping Delete, F2, F10, or occasionally F12 like a hyperactive woodpecker until the UEFI graphical interface pops up.
Once you are staring at the main dashboard, immediately switch out of “Easy Mode.” You want Advanced Mode. Motherboard engineers love to hide power settings in completely illogical, deeply buried sub-menus. An Asus board puts it in one place, while Gigabyte shoves it somewhere else entirely, often under a completely different naming convention.
Generally, you are hunting for a menu labeled Power Management, ACPI Configuration, or Advanced Configuration. Inside that specific directory, look for a setting named “Power On By PCI-E,” “Wake Up On LAN,” “Resume By Onboard LAN,” or “PME Event Wake Up.”
Toggle that setting from Disabled to Enabled.
If you are struggling to find the exact toggle, don’t panic. Learning exactly how to enable Wake-on-LAN (WoL) in your BIOS often requires a bit of frustrating menu diving. Sometimes, it hides under a submenu called “Wake Up Event Setup.” On modern ASRock boards, you might find it lurking inside the “ACPI Configuration” tab under the somewhat cryptic label “PCIE Devices Power On.” Just keep clicking through the advanced tabs until you spot a reference to PCIe or LAN waking.
The ErP / EuP Complication
Here is the trap that catches almost everyone. Look for a setting called ErP Ready, EuP Ready, or Deep Sleep. As I mentioned earlier, this is a deep sleep energy-saving feature. You must absolutely disable this toggle. If ErP is enabled, the motherboard physically severs the 5-volt standby power to the PCIe slots and the onboard Ethernet port the moment the PC shuts down. A powerless NIC cannot listen for incoming traffic.
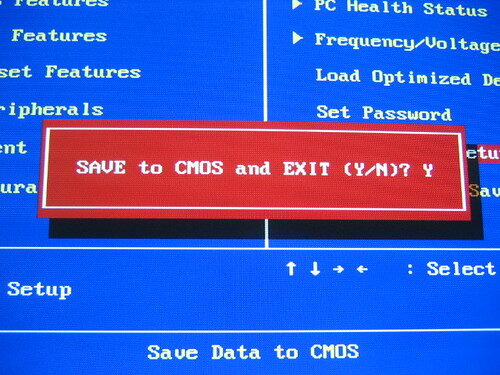
Save your changes. Usually, hitting F10 will prompt a save and reset confirmation box. You have officially conquered the hardware layer.
Navigating Vendor-Specific Idiosyncrasies
Building a custom gaming rig at home is one thing. Dealing with proprietary enterprise hardware is an entirely different beast. Every major corporate manufacturer has a slightly different philosophy on how power management should operate at the silicon level.
Take Dell OptiPlex machines, for example. If you want to figure out exactly how to enable Wake-on-LAN (WoL) in your BIOS on a fleet of Dells, you have to deal with the infamous “Deep Sleep Control” setting. By default, Dell ships their business machines with Deep Sleep enabled for S4 and S5 states to comply with aggressive corporate energy metrics. If you turn on the Wake on LAN setting under the Power Management tab, but forget to disable Deep Sleep Control, the machine will ignore your magic packets entirely. The settings literally contradict each other, and the firmware won’t warn you.
Lenovo ThinkCentres are equally stubborn. In the Lenovo UEFI, you usually navigate to the Power menu and look for “Automatic Power On.” Under that, you will find the Wake on LAN toggle. However, Lenovo machines often feature a secondary setting called “Wake from PCI Device” that also needs to be activated. Older ThinkCentres actually feature a physical jumper pin on the motherboard itself that dictates whether the PCI bus receives standby power. If that tiny piece of plastic is sitting on the wrong two pins, no amount of software tweaking will save you.
HP EliteDesks hide their settings under the Advanced tab, labeled “Built-In Device Options.” You have to scroll past all the audio and USB configurations to find the Wake on LAN toggle. HP also includes a feature called “Network Boot.” While not strictly required for waking the machine, enabling Network Boot (PXE) forces the hardware to initialize the network stack earlier in the boot process, which frequently resolves weird wake-up inconsistencies on older firmware revisions.
Configuring Windows to Play Nice
Hardware is only half the battle. If you boot into Windows and then shut down, the operating system can actually overwrite your carefully planned hardware settings and turn the network card off completely to save a few milliwatts of power. We have to explicitly tell Windows to leave the NIC alone during the shutdown sequence.
Right-click the Start button. Hit Device Manager.
Expand the Network adapters section and find your primary Ethernet controller. It will likely say something like Intel Gigabit Network Connection or Realtek PCIe GbE Family Controller. Double-click it to open the properties window.
Click over to the Power Management tab.
You need to check three specific boxes here:
- Allow the computer to turn off this device to save power: Counterintuitive, I know, but checking this box is actually required to unlock the subsequent options.
- Allow this device to wake the computer: This grants the driver permission to pass the hardware interrupt to the OS kernel.
- Only allow a magic packet to wake the computer: This is critically important.
If you skip that last checkbox, every random broadcast ping on your local network will wake your PC up. You will shut it down, walk away, and ten minutes later it will randomly turn itself back on because a smart TV asked for a DHCP lease. Annoying, right?
The Fast Startup Menace
Windows 10 and Windows 11 feature a deeply flawed mechanic called Fast Startup. When you click “Shut down,” Windows doesn’t actually shut down. It closes your user applications, logs you out, and then hibernates the system kernel. This hybrid sleep state severely messes with standard ACPI power states and frequently breaks WoL functionality entirely.
Open the old-school Control Panel. Navigate to Power Options, then click “Choose what the power buttons do” on the left sidebar. Click the little administrative shield icon that says “Change settings that are currently unavailable,” and explicitly uncheck “Turn on fast startup (recommended).”
Save your changes. Yes, your PC might take three extra seconds to boot from a cold state, but your remote wake capabilities will actually function reliably every single time.
The Linux Route: Ethtool is Your Best Friend
If you run a headless Ubuntu server, a Debian NAS box, or an Arch Linux workstation, the OS configuration relies entirely on a command-line utility called ethtool. Linux handles network interfaces differently than Windows, and by default, it usually powers down the NIC completely upon halting the system.
First, find your network interface name by typing ip a. Let’s assume it is eth0.
Run sudo ethtool eth0 and look at the terminal output. You are searching for two specific lines: Supports Wake-on and Wake-on.
The “Supports Wake-on” line will display a string of letters indicating what wake methods the physical hardware supports. The letter ‘g’ stands for Magic Packet. If you see a ‘g’ there, you are in business. The “Wake-on” line shows the current active setting. If it says ‘d’ (disabled), you have a problem.
To fix it, type: sudo ethtool -s eth0 wol g
This command tells the Linux kernel to leave the NIC listening for magic packets during the shutdown process. However, this setting resets immediately on reboot. You will need to add that exact command to a systemd service file, a cron job running at reboot, or a network dispatcher script to make the behavior persistent across power cycles.
Navigating the Network: Routers, Switches, and ARP Tables
So, the motherboard is ready. The OS is configured. Now you need to actually deliver the payload. Sending a magic packet from a laptop sitting on the same living room couch as the target PC is trivial. Any free smartphone app can broadcast the packet across the local subnet, hitting every device simultaneously, and the target PC will wake up instantly.
But what if you are sitting in a coffee shop in Tokyo, trying to wake a machine sitting in a basement in Chicago?
That requires crossing the global internet, hitting your home router, passing through the NAT firewall, and successfully delivering a Layer 2 frame to a machine that currently lacks an active IP address. This is where things get genuinely messy.
Locating Your Physical Address (MAC)
You cannot send a wake signal without knowing exactly where to point the gun. The MAC address is a unique, 48-bit identifier burned into the silicon of your network interface card at the factory. It looks like a string of twelve alphanumeric characters, usually separated by colons or hyphens.
Finding it is easy, but you must do it before you shut the machine down.
On a Windows machine, open the Command Prompt. You don’t even need administrator privileges. Type ipconfig /all and hit Enter. You will see a massive wall of text. Scroll through until you find the heading for your primary Ethernet adapter. Look for the line labeled “Physical Address.” It will look something like 00-1A-2B-3C-4D-5E. Write that down. Save it in your phone notes. You will need it constantly.
Static IPs and MAC Bindings
When a home router receives a packet destined for a specific IP address, it looks at its ARP (Address Resolution Protocol) table to match that IP to a physical MAC address. If a computer has been turned off for a few hours, the router flushes that MAC address from its volatile ARP cache to save memory. Routers are lazy. They forget offline devices quickly. When your remote magic packet arrives from Tokyo, the router says, “I have no idea who this belongs to,” and drops the packet into the void.
To bypass this frustrating limitation, you must log into your router’s administrative web panel and create a static ARP binding. You are permanently telling the router: “MAC address AA:BB:CC:DD:EE:FF always belongs to IP 192.168.1.50, even if the machine appears totally offline.”
Port Forwarding UDP 7 and 9
Magic packets are traditionally sent via UDP on port 7 or port 9. You need to set up a port forwarding rule in your router that takes incoming external traffic on UDP port 9 and directs it straight to the specific local IP address of your sleeping machine.
Let’s map out exactly what a successful configuration looks like in a typical home or small business environment.
| Router Setting | Required Configuration | Why it matters logically |
| DHCP Reservation | Bind target PC’s MAC to a static local IP (e.g., 192.168.1.100). | Ensures the PC always receives the exact same IP address from the router upon booting. |
| ARP Binding | Permanently link the static IP to the MAC address in the routing table. | Prevents the router from forgetting the sleeping PC’s physical location after the ARP cache flushes. |
| Port Forwarding | Forward external UDP Port 9 to internal IP 192.168.1.100. | Allows the inbound magic packet to cross the NAT firewall from the hostile outside internet. |
| Dynamic DNS (DDNS) | Setup a hostname (e.g., myhomenet.ddns.net). | Your public ISP IP changes frequently. DDNS gives your phone app a permanent address to target. |
If you are struggling to remember the exact sequence of networking events, just review the table above. When someone asks me how to enable Wake-on-LAN (WoL) in your BIOS and get it working reliably over the internet, I always point them back to the ARP binding step. It is the single most common point of failure for remote wake setups. People blame their motherboard when their router is actually the culprit.
Subnet Directed Broadcasts: The Nuclear Option
Sometimes, consumer routers absolutely refuse to support static ARP bindings. Netgear routers, for instance, are notoriously stubborn about letting users manually edit the ARP table via the web GUI. If you find yourself in this situation, you have to use a technique called a Subnet Directed Broadcast.
Instead of forwarding port 9 to a specific IP address like 192.168.1.50, you forward port 9 to the broadcast address of your entire subnet, which is usually 192.168.1.255. When the magic packet hits the router, the router screams the packet out to every single device connected to the network simultaneously. The sleeping PC hears its MAC address in the noise and wakes up.
Enterprise Cisco gear disables subnet directed broadcasts by default because it opens the door to Smurf attacks and massive network congestion, but on a small home network, it works flawlessly. Just be aware that many modern consumer routers are starting to block broadcast forwarding in newer firmware updates for security reasons.
Advanced Troubleshooting: Sniffing Packets with Wireshark
Let’s say you followed every single step perfectly. You flipped the hardware toggles, you adjusted the Windows Device Manager, you set up the static IP, and you forwarded port 9. You send the magic packet from your phone while standing in the kitchen. Nothing happens. The fans stay perfectly still.
It is incredibly frustrating. You are operating entirely in the blind.
This is where we stop guessing and start actively measuring. We need to verify if the magic packet is actually arriving at the target network card, or if it is getting swallowed by a firewall along the way. To do this, we use a free, open-source packet analyzer called Wireshark.
Keep the target computer turned on for this test. Boot up a secondary laptop on the same local network.
Install Wireshark on the target PC. Open it up, select your primary Ethernet interface, and start capturing traffic. The screen will immediately fill with thousands of background packets—DNS queries, ARP requests, random multicast chatter. It is overwhelming visually.
We need to aggressively filter the noise. In the display filter bar at the top of the Wireshark window, type wol and hit enter. The screen will go completely blank. Wireshark is now ignoring everything except recognized magic packets.
Grab your phone, disconnect from the local Wi-Fi so you are operating purely on cellular data, and use your WoL app to send a wake command to your public home IP address.
Watch the Wireshark screen on the target PC.
Did a single line of data suddenly appear? If yes, congratulations. The packet successfully traversed the internet, passed through your router’s NAT firewall, and hit the network card. Your network configuration is flawless. If the computer refuses to wake up from sleep despite successfully receiving the packet, your problem is 100% isolated to the motherboard power states or the Windows driver configuration.
If the Wireshark screen remains completely blank when you send the command from your phone, the packet is dying in transit. Your router is actively dropping it. Go back and check your UDP port forwarding rules and your ARP bindings. Your Internet Service Provider might even be blocking incoming UDP traffic on port 9 at the neighborhood node level, which happens much more often than network engineers care to admit.
PCIe Add-in Cards vs. Onboard LAN
Most people rely on the Ethernet port soldered directly onto the back of their motherboard. But what happens if you add a dedicated 10-Gigabit PCIe network card? Does the wake process change?
Yes, significantly.
In the old days of PCI slots (pre-2005), network cards physically lacked the ability to pull standby power from the motherboard slot. You had to connect a tiny, fragile 3-pin cable from the top of the network card directly into a specific header on the motherboard labeled “WOL.” If you forgot that cable, remote waking was impossible.
Modern PCIe 3.0 and 4.0 slots natively deliver 3.3V of auxiliary power directly through the slot pins, eliminating the need for extra cables. However, you must tell the motherboard to listen to the PCIe bus for wake events. In your UEFI settings, this is usually labeled “Wake on PCIe Device” or “Power On By PCI-E.” If you install a dedicated Intel X540-T2 network card, simply enabling “Resume By Onboard LAN” will not work, because the onboard LAN controller is no longer handling the traffic.
Can You Use Wake on Wireless LAN (WoWLAN)?
I get this question constantly. You have a sleek new motherboard with built-in Wi-Fi 6E, and you don’t want to run a hideous yellow Ethernet cable across your hallway just to get remote wake capabilities.
The brutal truth? Wake on Wireless LAN exists, but it is a profoundly miserable experience to configure and maintain.
Wired Ethernet is brilliantly simple. A physical copper wire carries a voltage directly to the NIC. Wi-Fi requires an active, authenticated radio connection to a wireless access point. When a computer goes to sleep, maintaining that WPA3 encrypted radio link requires significantly more standby power than a dormant Ethernet controller.
Intel developed WoWLAN features for their wireless cards, but it requires the motherboard to support specific PCIe wake states, and the router must agree to hold the wireless association open while the client is asleep. If your router reboots during the night, or automatically changes wireless channels to avoid neighbor interference, the sleeping PC permanently loses its connection to the access point. It drops off the network entirely, and no magic packet will ever reach it.
If you absolutely must use wireless, you have to dig deep into the Windows Device Manager properties for your Intel Wi-Fi adapter. You need to enable “Wake on Magic Packet” and specifically check the box for “GTK rekeying for WoWLAN.” This allows the sleeping network card to silently negotiate new encryption keys with the router without waking up the main CPU. Even with perfectly dialed settings, it works maybe 70% of the time. If you want a guarantee, stick to copper wire.
The Secure Alternative: Local Wake via VPN or Raspberry Pi
Exposing a UDP port to the public internet makes a lot of security professionals deeply uncomfortable. Even though a magic packet cannot execute malicious code or grant remote desktop access, opening ports creates a tiny, unnecessary crack in your network perimeter. Botnets constantly scan the IPv4 space, looking for open UDP ports to exploit for reflection attacks.
If you want absolute reliability without compromising your firewall integrity, you need a local agent.
Instead of sending a magic packet across the wild internet, you establish a secure, encrypted tunnel into your home network using a Virtual Private Network (VPN) protocol like WireGuard or OpenVPN. Many modern consumer routers from Asus, Netgear, and TP-Link have WireGuard servers built right into the factory firmware.
You connect your phone or laptop to the VPN. Your device is now virtually sitting inside your local living room. From there, you just broadcast a standard local magic packet. No port forwarding required. No static ARP bindings needed, because the packet never has to cross the NAT boundary. The router treats it as internal traffic.
Another incredibly popular method among sysadmins is leaving a tiny, low-power device running 24/7 on the local network to act as a dedicated wake-up server. A Raspberry Pi Zero draws less than a single watt of power. You can SSH into the Pi remotely, and then issue a simple command-line wakeonlan instruction directly from the Pi to your heavy, power-hungry workstation. It is an elegant, bulletproof solution that entirely bypasses the notoriously flaky nature of consumer router ARP tables.
The Final Sanity Check
We have covered a massive amount of ground here, moving from hexadecimal packet structures to granular Windows driver tweaks. If you are feeling slightly overwhelmed by the sheer volume of variables, take a breath. The process requires a methodical, patient approach. Change one variable at a time, test it, and move forward.
Start entirely local. Do not attempt to wake your machine from a different city until you can consistently wake it from a laptop sitting three feet away. Prove the hardware works first.
Once you nail down the exact process of how to enable Wake-on-LAN (WoL) in your BIOS, you fundamentally change how you interact with your hardware. You no longer need to leave a 600-watt workstation idling 24/7 just in case you need to remote in to grab a single PDF file. You save electricity, you reduce thermal wear on your expensive components, and you gain total authoritative control over your machine’s physical state from anywhere on the planet.
It takes an hour of frustrating menu diving and router configuration, but the payoff is permanent. Go reboot your machine, start tapping that Delete key, and get your power management sorted out.