You hit the power button, grab your morning coffee, and sit down expecting the familiar lock screen. Instead, a jarringly cheerful light blue background assaults your retinas. Your PC demands attention. The text reads: “Your PC/Device needs to be repaired,” followed closely by a cryptic string of alphanumeric garbage pointing straight at a missing winload.efi file. Welcome to the club.
- What Actually Is the Boot Configuration Data (BCD)?
- The Absolute Prerequisite: A Windows 11 Installation USB
- Step 1: The Physical Interrogation
- Step 2: Forcing the Windows Recovery Environment
- Step 3: The Automatic Repair Gamble
- Step 4: Rebuilding the BCD via Command Prompt
- Step 5: The Diskpart Deep Dive (Advanced BCD Rebuild)
- Step 6: Repairing File System Corruption with CHKDSK
- Step 7: The System File Checker (SFC)
- Step 8: Checking the BIOS and the CMOS Battery
- Step 9: Data Rescue Before Nuclear Options
- Step 10: The Clean Installation
- Preventing the Nightmare from Returning
Knowing exactly how to fix error code 0xc00000e in Windows 11 isn’t something anyone actively wants to learn. It usually gets forced upon you at the worst possible moment. Like 11 PM on a Sunday when a massive project is due. You just want to finish that spreadsheet or play some games, right? Instead of telling you exactly what broke, Microsoft hands you a hex code that looks like a cat walked across a keyboard.
I hate this error. I really do.
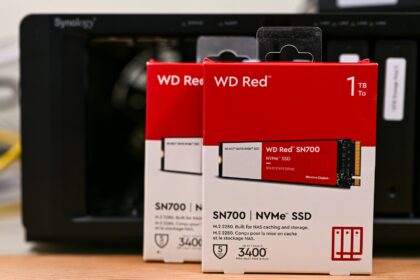
Back in late 2022, I was migrating a client’s aging 500GB SATA SSD over to a blazing-fast 2TB NVMe M.2 drive using a popular drive cloning tool. The progress bar hit 100 percent. Everything finished smoothly. I swapped the physical drives, hit the power button, and boom. Blue screen. The dreaded 0xc00000e. I spent three hours sweating under a cramped mahogany desk trying to rebuild the boot sector manually because the cloning software completely botched the EFI partition mapping. The files were all there, but Windows had absolutely no idea how to find them.
That is the core of your problem right now. Your files are almost certainly fine. Your operating system is still sitting on your hard drive. But the map that tells your motherboard how to locate Windows has been destroyed, corrupted, or misplaced.
What Actually Is the Boot Configuration Data (BCD)?
To fix this mess, you need to understand the mechanics of how your computer wakes up. When you press the power button, your motherboard’s firmware (the UEFI) wakes up first. It does a quick headcount of your hardware, ensuring the RAM is seated and the CPU is breathing. Once the hardware passes the test, the UEFI looks for a very specific, tiny partition on your storage drive. This is the EFI System Partition. It is usually exactly 100MB in size, and it is formatted in FAT32.
Inside that tiny partition lives a file called the Boot Configuration Data. The BCD.
Think of the BCD as the air traffic controller for your computer. It tells the motherboard, “Hey, Windows 11 is located right here, on this specific sector of this specific SSD. Here are the keys, go start the engine.” If a power outage corrupts that file, or a failing hard drive scrambles a few crucial bytes of data, the air traffic controller drops dead. The UEFI panics, throws its hands in the air, and slaps error code 0xc00000e on your monitor.
Common Triggers for the Missing BCD
Computers rarely break for absolutely no reason. Something specific triggered this failure. Pinpointing the root cause helps prevent you from staring at this exact same blue screen next month.
| Trigger Event | Probability | Technical Explanation |
|---|---|---|
| Unexpected Power Loss | High | If your house loses power exactly when Windows is writing a background update to the bootloader, the file becomes incomplete and unreadable. |
| Botched Drive Cloning | Very High | Moving from an old drive to a new one often misaligns the GUID partition tables. The new drive has a different physical ID that the old BCD doesn’t recognize. |
| Failing Storage Media (SSD/HDD) | Medium | NAND flash memory degrades over time. If the specific physical sector holding the winload.efi file dies, the boot sequence halts immediately. |
| Dead CMOS Battery | Low | A dead motherboard battery resets your BIOS settings, potentially reverting your boot mode from UEFI to Legacy. Windows 11 cannot boot in Legacy mode. |
The Absolute Prerequisite: A Windows 11 Installation USB
When people ask me how to fix error code 0xc00000e in Windows 11, the first thing I ask is whether they have another working computer nearby. Because you are going to need one. Your current PC is completely locked out of the Windows environment, which means you cannot download diagnostic tools or run internal troubleshooters. You have to bring the tools in from the outside.
You need a blank USB flash drive with at least 8GB of storage. Grab a laptop, a friend’s computer, or a library PC.
Head over to the official Microsoft website and search for the “Windows 11 Media Creation Tool.” Download the tiny executable file and run it. Accept the agonizingly long terms of service. Select “Create installation media for another PC.” Choose your language and the Windows 11 edition. Finally, select “USB flash drive” and point the software at your blank thumb drive.
Sit back. Wait.
The tool will download roughly 5GB of installation files and format the flash drive to make it bootable. This process usually takes anywhere from fifteen to forty-five minutes depending on your internet connection and the write speed of the cheap promotional thumb drive you found in your kitchen drawer. Do not pull the drive out prematurely. Let it finish verifying the download.
Step 1: The Physical Interrogation
Before we start typing aggressive commands into a black terminal, let’s look at the physical reality of your machine. Software fixes cannot repair hardware disconnections.
Turn your computer completely off. Unplug the power cable from the wall. Hold down the power button for twenty seconds to drain the residual flea power from the capacitors.
Open the side panel of your desktop case. If you are using an older SATA solid-state drive, check the thin data cable connecting the drive to the motherboard. These cables are notoriously flimsy. A heavy graphics card can sag over time, putting pressure on the SATA ports. Unplug the cable and plug it back in. Listen for the tiny plastic click.
If you are running a modern NVMe M.2 drive, which looks like a stick of gum screwed directly into the motherboard, ensure the tiny retention screw hasn’t backed out. I have seen laptops throw the 0xc00000e error simply because the user dropped their backpack too hard, causing the M.2 drive to physically slip a millimeter out of its socket. Reseat the drive. It takes two minutes and saves hours of software headaches.
Unplug every single USB device except your keyboard and mouse. No webcams. No external hard drives. No printer cables. Sometimes, a faulty USB controller on an external device sends a panic signal to the motherboard during POST, freezing the bootloader sequence.
Step 2: Forcing the Windows Recovery Environment
Plug the power back in. Insert the Windows 11 USB drive you created earlier into a high-speed port directly on the motherboard—avoid the front panel ports on your case if possible, as their internal headers can sometimes be unreliable.
Turn the PC on and immediately start hammering your boot menu key. Depending on your motherboard manufacturer, this is usually F8, F11, F12, or sometimes Esc. An ugly, text-based menu will pop up asking you what device you want to boot from. Select your USB flash drive. It might be labeled “UEFI: SanDisk” or something similar.
The Windows logo will appear. A setup window will prompt you to choose your language and keyboard layout. Click Next.
Do not click “Install Now.” That will wipe your drive.
Look at the bottom left corner of the window. You will see a small, unassuming link that says “Repair your computer.” Click that link. You have just successfully bypassed the broken bootloader on your hard drive and loaded a miniature, functional operating system directly from your USB stick. You are now inside the Windows Recovery Environment (WinRE).
Step 3: The Automatic Repair Gamble
Figuring out how to fix error code 0xc00000e in Windows 11 often boils down to outsmarting the command prompt, but we should always let Windows try to fix itself first. It rarely works. But you still have to try.
Click on “Troubleshoot.”
Click on “Advanced Options.”
Click on “Startup Repair.”
Windows will now spend the next ten minutes desperately scanning your hard drive, attempting to locate the missing BCD file and patch it automatically. The screen will go black a few times. The loading circle will spin. Eventually, you will likely get a message saying “Startup Repair couldn’t repair your PC.”
Don’t panic. We expected this. Microsoft’s automated tools are famously timid. They refuse to overwrite heavily corrupted files for fear of deleting user data. We need to take off the training wheels and do it manually.
Step 4: Rebuilding the BCD via Command Prompt
Navigate back to the “Advanced Options” menu. This time, click on “Command Prompt.”
A stark black window with white text will open. This is where the actual repair happens. You are operating with administrative privileges here, so type carefully. We are going to use a built-in utility called `bootrec` to scan your physical drives for Windows installations and force the creation of a brand new Boot Configuration Data file.
Type the following commands exactly as written, pressing Enter after each line:
bootrec /fixmbrbootrec /fixbootbootrec /scanosbootrec /rebuildbcd
Let me explain what you are actually doing here. You aren’t just typing random spells. The `fixmbr` command writes a Windows-compatible Master Boot Record to the system partition. The `scanos` command forces the system to scour every connected hard drive for installations of Windows that aren’t currently listed in the boot manager. Finally, `rebuildbcd` takes the results of that scan and asks you if you want to add them to the boot list.
If you type `bootrec /rebuildbcd` and the prompt returns a message saying “Total identified Windows installations: 1”, press the letter “Y” for Yes and hit Enter. The system will say “The operation completed successfully.”
Reboot your computer. If Windows loads, you win. Go take a break.
The Infamous “Access Denied” Roadblock
If you are still reading this, things probably didn’t go smoothly.
When you typed `bootrec /fixboot`, there is a massive chance the terminal spat back a frustrating error: “Access is denied.” This is an incredibly common friction point in Windows 11. Microsoft changed the permissions regarding the EFI partition, and the standard bootrec tool simply doesn’t have the security clearance to overwrite the boot sector anymore.
Amateur guides usually stop here. They tell you to reinstall Windows. We are not going to do that. We are going to bypass the permission block by manually mounting the hidden EFI partition and rewriting the files from the inside out.
Step 5: The Diskpart Deep Dive (Advanced BCD Rebuild)
Stay in the Command Prompt. We need to use a powerful disk management tool called `diskpart`. This tool allows us to see hidden partitions that Windows normally hides from you to prevent accidental deletion.
Type diskpart and press Enter. The prompt will change to show that you are now inside the utility.
Type sel disk 0 and hit Enter. (Assuming your main Windows drive is disk 0. If you have multiple drives, you might need to type list disk first to identify which drive holds your operating system based on its gigabyte size).
Type list vol and press Enter.
A table will appear showing all the volumes on that specific hard drive. You are hunting for a very specific volume. Look down the list for a volume that is formatted in “FAT32”. It will usually be hidden, and its size will be around 100MB to 300MB. It will not have a drive letter assigned to it. Let’s assume this volume is listed as Volume 3.
Type sel vol 3 and press Enter.
Now we need to give this hidden partition a drive letter so we can interact with it. Pick a letter that isn’t being used by anything else, like V.
Type assign letter=V: and press Enter. The terminal will confirm the letter was assigned.
Type exit to leave the diskpart utility, but keep the command prompt open. You are now back in the standard terminal, but you have exposed the brain of the Windows bootloader.
Now, we navigate into that newly exposed partition. Type cd /d V:\EFI\Microsoft\Boot\ and press Enter. You are now standing directly inside the folder that holds the corrupted BCD file.
Type bootrec /fixboot. Because you are physically inside the directory, the “Access Denied” error often disappears. But we aren’t done.
We need to back up the broken BCD file before we overwrite it, just in case. Type ren BCD BCD.bak and press Enter. This renames the file, effectively hiding it from the system while keeping it safe.
Finally, we generate a completely fresh bootloader from scratch. Type the following command:
bcdboot c:\Windows /l en-us /s V: /f ALL
Press Enter. You should see a message stating “Boot files successfully created.” You just manually mapped the physical location of your operating system directly into the motherboard’s firmware partition. Remove your USB drive, close the command prompt, and restart the PC.
Step 6: Repairing File System Corruption with CHKDSK
If you are still reading a guide on how to fix error code 0xc00000e in Windows 11 at this point, you might be dealing with a hardware ghost. The bootloader might be perfectly fine, but the actual physical sectors on your hard drive where the bootloader lives are dying.
Hard drives and SSDs develop bad sectors over time. A soft bad sector happens when the power cuts out while the drive is writing data, scrambling the magnetic or electrical charge. A hard bad sector happens when the physical flash memory degrades to the point where it can no longer hold an electrical charge at all.
Boot back into your USB recovery drive. Go back to the Command Prompt.
Type chkdsk C: /f /r /x and press Enter.
This command is heavy. The /f tells the tool to fix any logical file system errors it finds. The /r tells it to locate bad physical sectors and attempt to recover any readable information from them. The /x forces the volume to dismount first so the scan can run uninterrupted.
Go make lunch. Seriously. Depending on the size of your drive and its speed, a deep chkdsk scan can take anywhere from twenty minutes to four hours. You will see a percentage ticking up slowly on the screen. Let it finish. If it finds a cluster of bad sectors right where the winload.efi file was sitting, it will forcefully move that file to a healthy part of the SSD and mark the bad sector as “do not use.”
Step 7: The System File Checker (SFC)
Once chkdsk finishes, run one more scan to ensure the core Windows system files aren’t missing. Sometimes viruses or aggressive third-party antivirus software will quarantine essential boot files.
In the command prompt, type sfc /scannow /offbootdir=C:\ /offwindir=C:\Windows and press Enter.
The standard `sfc /scannow` command doesn’t work perfectly from the recovery environment because the tool tries to scan the X: drive (the temporary USB environment) instead of your actual C: drive. Those extra flags force the tool to look at your physical hard drive. It will compare your local system files against a compressed, pristine backup image. If it finds a modified or missing file, it rips it out and replaces it with the clean version.
Step 8: Checking the BIOS and the CMOS Battery
Let’s pivot for a second. Software troubleshooting is exhausting. What if the software is perfectly fine, but the motherboard has amnesia?
Every motherboard has a tiny, silver, coin-cell battery slotted into it. It is a standard CR2032 watch battery. This battery provides a constant trickle of power to the CMOS chip, which stores your BIOS settings and keeps the system clock running even when the PC is unplugged from the wall.
These batteries cost two dollars. They die after about five to seven years. When they die, your motherboard forgets everything. The clock resets to January 1st, 2010. More importantly, the BIOS forgets its custom boot settings.
Windows 11 strictly requires a technology called Secure Boot, and it requires the motherboard to operate in UEFI mode. If your CMOS battery dies, many older motherboards will panic and default back to “CSM” or “Legacy” boot mode for maximum compatibility. Windows 11 hates Legacy mode. It cannot read a GPT-formatted partition in Legacy mode. The result? Error 0xc00000e.
Restart your computer and hammer the Delete or F2 key to enter your BIOS settings. Look at the system clock. Is the time completely wrong? If so, your battery is dead. Go to the store, buy a new CR2032, pop the old one out with a flathead screwdriver, and snap the new one in.
While you are inside the BIOS menu, look for a tab labeled “Boot” or “Security.” Ensure that “Boot Mode” is explicitly set to UEFI. Disable CSM (Compatibility Support Module). Ensure that “Secure Boot” is enabled. Save your changes and exit. The motherboard should now be able to see the Windows 11 bootloader again.
Step 9: Data Rescue Before Nuclear Options
Understanding how to fix error code 0xc00000e in Windows 11 permanently means accepting that hardware eventually dies. If you have tried rebuilding the BCD, running chkdsk, and fixing the BIOS, and your computer still throws the blue screen, your storage drive’s controller might have failed.
When an SSD controller detects massive, cascading failures in the NAND flash memory, it will often lock the entire drive into a “read-only” state to preserve whatever data is left before the drive completely bricks itself. You cannot write a new BCD file to a drive locked in read-only mode.
Before you wipe the drive and reinstall Windows, you need to save your files. You can do this without paying a data recovery lab thousands of dollars.
Use another computer to download a lightweight Linux distribution, like Ubuntu. Flash it onto a USB drive using a tool like Rufus. Boot your broken PC from the Ubuntu USB drive. Select the option to “Try Ubuntu without installing.”
You will load into a fully functional Linux desktop environment running entirely off your RAM and the flash drive. Open the file manager. Look for your Windows hard drive in the side panel. Click it to mount it. Navigate to C:\Users\YourName\. Plug in an external USB hard drive, and drag your Documents, Pictures, and Desktop folders over to the external drive.
Linux ignores Windows file permissions. It doesn’t care about the broken bootloader. It just reads the raw data. This is the single most effective way to rescue a decade of family photos from a dying Windows installation.
Step 10: The Clean Installation
You rescued your files. The commands failed. The hardware checks out, but the OS refuses to breathe. It is time to wipe the slate clean.
Boot from your Windows 11 installation USB one last time. Instead of clicking “Repair your computer,” click “Install Now.” Accept the terms. Choose “Custom: Install Windows only (advanced).”
You will see a list of partitions on your drive. You need to delete all of them. Click on Partition 1, click Delete. Click on Partition 2, click Delete. Do this until your entire drive is listed as a single block of “Drive 0 Unallocated Space.”
Select that unallocated space and click Next. Windows will automatically recreate the hidden EFI partition, build a pristine BCD, format the main partition, and install a fresh copy of the operating system. It takes about twenty minutes on a modern NVMe drive. Your PC will restart a few times. Eventually, Cortana will aggressively introduce herself, and you will be back on a working desktop.
Preventing the Nightmare from Returning
You survived. You beat the error code. But you never want to do this again.
First, buy an Uninterruptible Power Supply (UPS). A decent battery backup costs about sixty bucks. You plug your PC tower directly into it. When a summer storm knocks out the power grid, the battery kicks in instantly, giving you ten minutes to save your work and shut down the computer properly. This completely eliminates the risk of power-loss data corruption breaking your boot files.
Second, stop relying on manual backups. Set up an automated imaging software. Tools like Macrium Reflect or Veeam can take a snapshot of your entire C: drive every night at 2 AM. If the 0xc00000e error ever pops up again, you don’t have to mess with command prompts or diskpart. You just boot into the recovery software, click “Restore Image,” and your PC travels back in time to exactly how it was yesterday morning.
Technology is fragile. The files that dictate whether your computer turns on or remains an expensive paperweight are incredibly vulnerable to bad luck. By keeping your hardware seated properly, maintaining a recovery USB in your desk drawer, and understanding exactly what the boot configuration data actually does, you strip the mystery away from the blue screen.