Quick setup tips for getting live voice through portable gear without fuss. Many portable models are built for music playback and lack dedicated inputs, so you may need an adapter or small wireless rig.
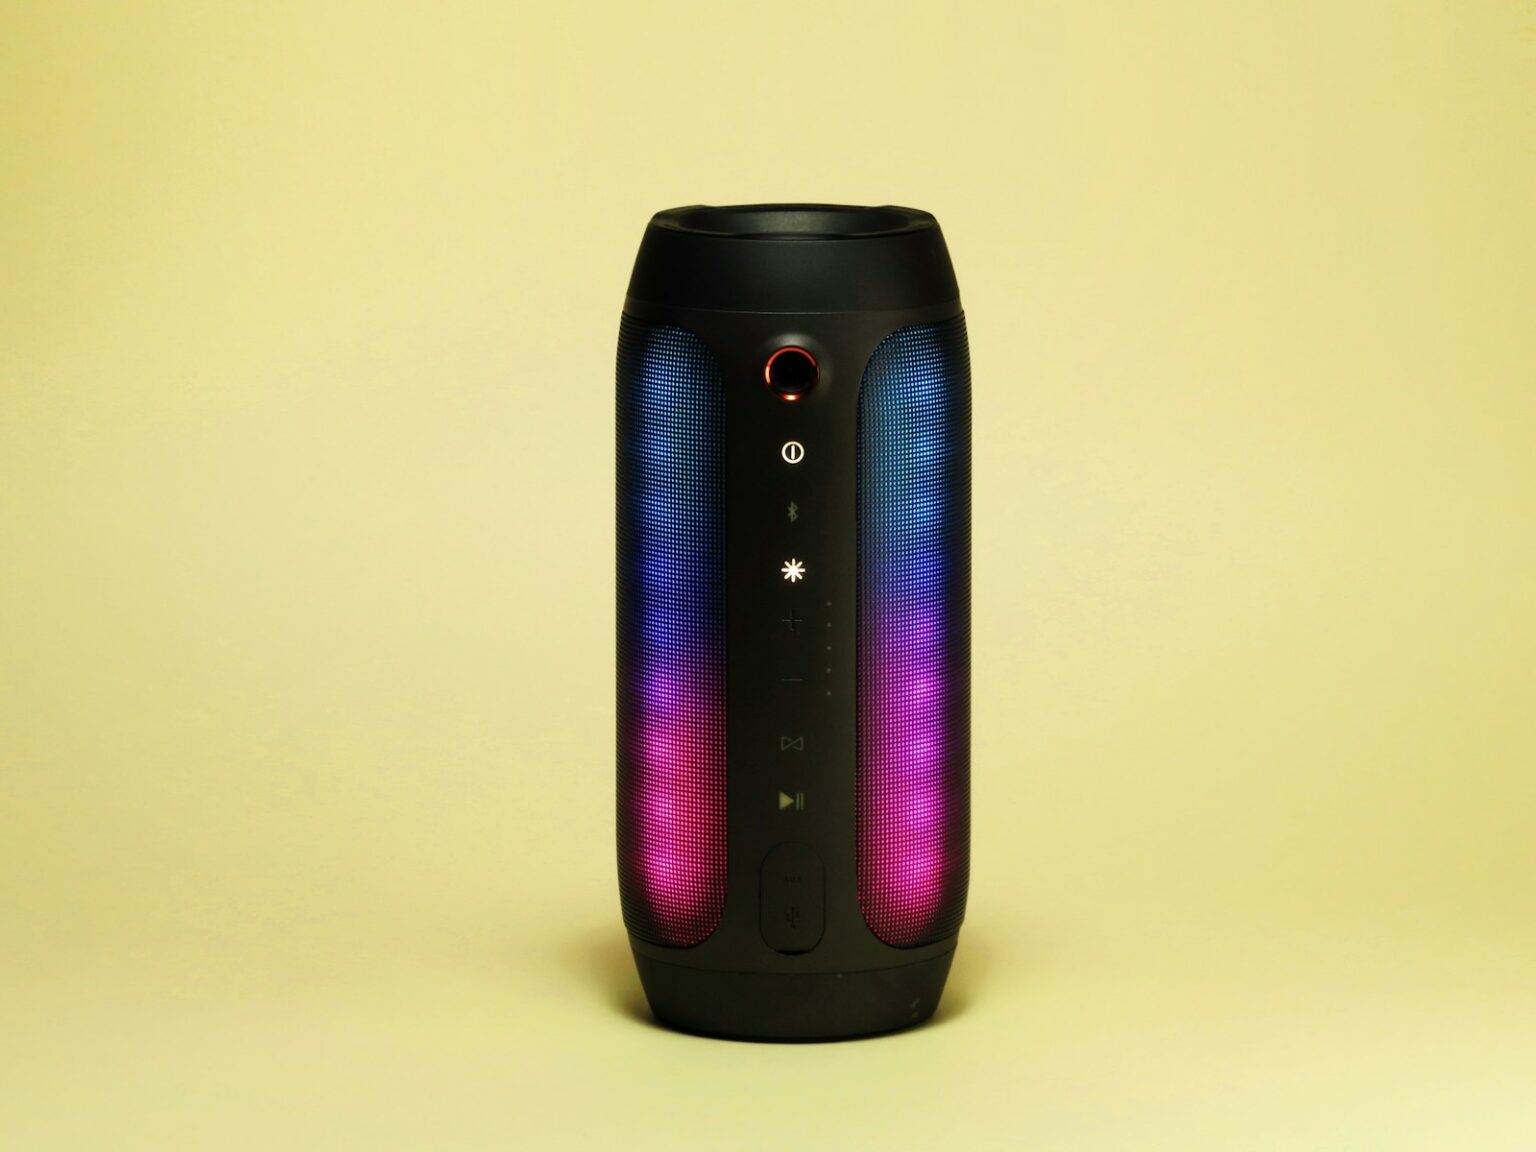
Start simple: power both units, put the speaker in pairing mode, and try a direct pairing if your mic supports it. For most mics, a Shure or Rode handheld, a wireless transmitter and receiver work best with a JBL or Bose unit.
If pairing fails, use a compact receiver wired into the speaker’s AUX or RCA input. That route avoids the delay that bluetooth can add and gives cleaner sound for speech or singing.
We’ll cover gear, common ports (XLR, 1/4″, 3.5mm, RCA), level checks, and quick fixes for no-sound or feedback. The goal is a safe, reliable setup that protects gear and gets clear audio fast.
What You’ll Learn Today about Bluetooth Mic-to-Speaker Connections
You’ll get clear, practical steps for getting speech or singing through portable audio rigs.
Quick overview: learn the core differences between wired microphones and playback units so you pick the right setup fast. We explain when a fully wireless rig helps and when a small cable or adapter provides better sound.
Follow a tested five-step routine: charge and power devices; power on transmitter and receiver; plug the receiver into the playback input; turn on the main unit and set levels; run a short voice test. This saves time and reduces surprises during events.
- What to check on your bluetooth speaker before you start, so you don’t hunt for missing inputs.
- Step-by-step pairing cues, including mode LEDs and simple checks that confirm a live link.
- Fast tests for gain, clipping, and feedback so the mic sounds clean in any space.
- Real-world uses — meetings, backyard karaoke, and quick presentations — with short troubleshooting tips.
By the end, you’ll have a short checklist: power, pairing, ports, cables, and a brief voice test that keeps events running smoothly.
Understanding Microphones and Wireless Systems
Before wiring anything, know which mic style fits your event and how wireless options differ. That helps you pick gear that works with available inputs and keeps setup simple.
Types: dynamic, condenser, and lapel
Dynamic models are rugged and handle loud voices well, so they shine for speeches and casual karaoke.
Condenser types capture more detail but need careful gain control and a quieter room to avoid harshness.
Lapel (lavalier) mics clip on for hands-free movement and suit presentations or demos where gestures matter.
Wireless systems: radio links and pairing
Most wireless setups use a transmitter that sends audio to a matched receiver. The receiver then feeds your unit via XLR or 1/4 inch input for balanced, low-noise output.
Bluetooth-style wireless microphones can pair directly with a portable playback device, but UHF/VHF radio systems offer longer range and dedicated channels for fewer dropouts.
- Balanced XLR gives better noise rejection than unbalanced 3.5mm feeds.
- Small mics may use 3.5mm plugs and require adapters to fit pro inputs.
- Check for a true mic input on your playback unit; otherwise use a receiver, mixer, or bridge.
Know Your Speaker: Active, Passive, and Bluetooth Models
Knowing whether your unit is active, passive, or pure wireless saves setup time. Identifying the type tells you what extra gear you need and how simple the mic path will be.
Why most bluetooth speakers lack dedicated mic inputs
Many portable players are built for music playback and omit true mic-level inputs. Manufacturers aim for compact design and streaming ease, not live vocal use.
Result: you may only find a 3.5mm aux or no input at all, which limits plug-and-play options for a microphone and increases reliance on adapters or bridges.
When to consider an active speaker or mixer instead
Active units include built-in amps and often have XLR or 1/4″ mic/line ports. That gives reliable gain control and cleaner sound for speech or singing.
Passive speakers need an external amplifier and extra cabling, so they are less handy for quick setups.
If you have more than one mic or want EQ and effects, use a compact mixer as the hub, then feed an active unit or stream via the mixer’s wireless output.
- Check actual ports: XLR, 1/4″, or 3.5mm before planning.
- A receiver into an active input usually yields the most consistent results.
| Type | Typical Inputs | Best Use |
|---|---|---|
| Active | XLR, 1/4″, sometimes 3.5mm | Presentations, small gigs, simple live sound |
| Passive | Speaker terminals (requires amp) | Fixed installs, larger PA arrays |
| Bluetooth models | 3.5mm aux or none | Music playback, casual events; needs bridge for live mics |
Audio Connections You’ll See in the Real World
Real-world rigs use a handful of familiar connectors; knowing them saves setup time and frustration.
XLR is the pro standard. It carries a balanced signal that rejects interference, so use it for long runs and for receivers that feed pro gear.
1/4 inch jack plugs come in two common types: TS (unbalanced) and TRS (balanced or stereo). Pick the right jack so you avoid hum or level mismatch.
Small gear often uses 3.5mm aux or RCA jacks. A simple 3.5mm-to-6.35mm adapter will feed many active units. For older home systems, an XLR-to-RCA or 1/4″-to-RCA cable may be needed.
- Learn why XLR connections reduce noise and are reliable for microphones and receivers.
- Know TS vs TRS so your jack choice matches the cable and the input.
- Keep cable runs short and use snug connectors to prevent dropouts.
- If your wireless microphone receiver has multiple outputs, match its cleanest output to your speaker input.
| Connector | Common Use | Best Practice |
|---|---|---|
| XLR | Pro mics, receiver outputs | Use balanced XLR for long runs and noisy venues |
| 1/4″ jack | Instruments, some mic lines | Match TS or TRS to prevent hum |
| 3.5mm / RCA | Portable gear, home audio | Use adapters to match input/output levels |
Quick Start: The Fastest Way to Connect A Microphone To A Bluetooth Speaker
Power up both units and get them into pairing mode. Press and hold each device’s pairing button until a blinking light shows they are discoverable.
Pairing steps:
- Power the wireless mic and the bluetooth speaker, then hold pairing until LEDs blink.
- Select the speaker from the mic’s device list; some models auto-pair and the LED will turn solid.
- Say a short sentence to check the sound and slowly raise volume to avoid sudden jumps.
If pairing fails, clear saved devices on both units and try again. Keep both devices close during the process to speed discovery and cut dropouts.
Note: This cable-free route saves time, but expect some latency. For speech, low-latency gear gives better sync. If the speaker uses multipoint, disconnect other active sources (like a phone) so audio stays on your live feed.
Step-by-Step: Using a Wireless Mic System with Receiver and a Bluetooth Speaker
Start by powering every unit fully so you don’t lose audio mid-event. Install fresh batteries or charge transmitters, receivers, and the playback unit before you set up. This prevents sudden shutdowns during use.
Five-step routine:
- Power and charge: confirm transmitter and receiver batteries, then power the speaker with its master volume low.
- Pairing and link: turn on the transmitter and receiver. Wait for a steady indicator light that shows the wireless link is active.
- Cabling: use the receiver output that best matches the speaker input and secure the cable so it won’t snag.
- Level setting: set the receiver’s output or mic gain low, then raise the master volume slowly until levels are comfortable.
- Verify audio: speak “one-two-three” and listen for clear sound. Adjust gain to avoid clipping and watch for feedback.
Keep the receiver within line-of-sight of the transmitter to reduce dropouts. If audio crackles, move the receiver closer and remove obstructions between units.
Safety and good habits:
- Keep the handheld mic pointed away from the playback unit to reduce feedback.
- Label channels and save settings for faster setup next time.
- Use conservative gain staging: higher volume on the speaker, modest input gain on the receiver, and test with short voice counts.
| Step | Key Action | Quick Tip |
|---|---|---|
| Power | Charge all devices | Fresh batteries beat failures |
| Link | Pair transmitter & receiver | Wait for steady LED |
| Levels | Raise volume slowly | Speak “one-two-three” to check |
Using a Bluetooth Audio Receiver to Bridge a Wired Mic
Use a compact Bluetooth audio receiver with a 3.5mm input when your wired microphone must feed a streaming-only bluetooth speaker.
Pick the right receiver: choose a small unit that accepts a 3.5mm jack and, when possible, supports low-latency codecs. That reduces lip-sync lag and keeps speech natural.
Adapters and cabling
If the mic outputs via XLR or 1/4 inch, add a proper adapter or a simple preamp that steps the line down to the receiver’s 3.5mm input. Use short, shielded cable runs and tight-fitting adapters to avoid crackles and ground noise.
Latency and quality
Expect added delay compared with wired paths. For presentations where sync matters, prioritize receivers with aptX Low Latency or similar chipsets. If delay is unacceptable, choose a wired route into an active speaker or a dedicated wireless mic receiver.
- Tip: Pair the receiver with the bluetooth speaker, verify a steady link, then speak softly to confirm output and levels.
- Keep spare adapters and a short 3.5mm cable on hand for quick swaps.
- This method saves cost but adds setup steps; plan a quick pre-event test.
| Item | Why it matters | Quick pick |
|---|---|---|
| Receiver with 3.5mm | Accepts common line-level inputs; pairs to wireless outputs | Small unit with low-latency codec |
| XLR/1/4″ to 3.5mm adapter | Mates pro outputs to the receiver’s jack | Use a passive pad or preamp for level matching |
| Short shielded cable | Reduces noise and failures on the line | 20–30 cm, snug connectors |
Pro Routing: Mixer with Bluetooth Output for Multiple Mics
A mixer gives you tidy control when several sources need one managed output. Use the board as your central hub so lavaliers, handhelds, and instruments are easy to adjust on the fly.
Wiring and pairing: Plug each mic into the mixer’s mic inputs (usually XLR) and label channels. If the desk offers bluetooth out, put it in pairing mode and pair with your wireless output adapter or compatible device, then confirm the connection before the event.
When bluetooth output isn’t available, route the main outputs to an active speaker for lower latency. This gives tighter sync and more reliable volume control in live settings.
Tone and effects: Use EQ to cut harsh highs and reduce boxy mids. Apply reverb lightly so speech stays clear. Balance preamp gain per channel, then use the master fader for overall loudness while keeping headroom to avoid distortion.
- Label channels for quick mute and solo actions.
- Keep master volume moderate and tweak channel trims for clarity.
- This setup scales well for panels, small bands, or classrooms needing stable, multi-input audio.
| Need | Recommended Action | Benefit |
|---|---|---|
| Multiple inputs | Use XLR channels and label | Fast control and fewer errors |
| Wireless out | Pair mixer if supported | One-step streaming to a bluetooth speaker |
| Low latency | Use active speaker via mains out | Tighter sync and reliable volume |
Device Pairing Basics for Reliable Bluetooth Connections
Start by putting both units into pairing mode and watch the blinking light that shows they are discoverable. This is the fastest way to tell the devices can find each other.
Checklist for a smooth wireless setup:
- Put the mic side and the bluetooth speaker into pairing mode and confirm the blinking indicator.
- Make sure you clear old pairings when devices refuse to connect or keep switching back to phones.
- Keep devices within a few feet during the first pairing to speed discovery and reduce interference.
- If your bluetooth speakers support multipoint, disable other connected gadgets so audio stays on your feed.
- Reboot both units when pairing stalls, then retry with fresh power and a clean list of devices.
- Speak into the mic immediately after pairing to confirm the connection and that audio passes correctly.
Quick tips: Update firmware where possible and allow extra time the first time you pair new gear. This saves time at events and reduces last-minute surprises.
Testing Your Setup the Right Way
Begin your checks with a simple vocal count to set clean levels quickly. Say “one-two-three” at normal speaking level while the system is live. This reveals clipping and lets you set gain without surprises.
Raise master volume in small steps and listen for harshness or distortion. Use consonant-heavy words like “check, crisp, clear” to judge clarity. If you hear fuzz, lower input gain and try again.
Walk the room while speaking to map range and find dead zones. Keep the receiver in line-of-sight when possible; distance and obstacles cause dropouts. If audio cuts or hisses, move the receiver away from large metal objects, power strips, and chargers.
- Start with “one-two-three” to set gain and avoid clipping.
- Raise master level slowly; stop if sound becomes harsh.
- Walk audience areas to spot weak spots and interference.
- If dropouts occur, shorten the distance and clear line-of-sight.
- Note hums and reposition cables or the receiver from power sources.
- Save or mark settings so setup takes less time next event.
| Check | Action | Why |
|---|---|---|
| Level | Vocal count, adjust gain | Prevents clipping and keeps sound natural |
| Range | Walk-test while talking | Find dead spots and interference |
| Noise | Move receiver away from power | Reduces hum and static |
Reducing Latency, Dropouts, and Noise
Small changes in placement and cabling often cut delay and make live audio more reliable. Start with low-latency hardware where possible. That helps keep speech in sync, but remember wired or UHF/VHF systems usually have less delay.
Choosing low-latency profiles and channels
Pick devices that support low-latency codecs for better sync. If interference happens, try different channels or bands and keep other wireless gadgets off during the event.
Keep the receiver close and within line-of-sight. Shorten the distance to reduce dropouts and maintain steady links.
Cable quality, power isolation, and physical placement
Use short, well-shielded cables for any wired segments. Avoid running them parallel to power cords to cut hum and buzz.
Isolate audio gear from power bricks and chargers. Move the receiver and the main play unit away from Wi-Fi routers and big metal objects that can block signals.
- Prefer low-latency hardware for speech; wired or radio systems often give tighter sync.
- Keep clear line-of-sight and shorten distance between transmitter and receiver.
- Use quality, short cable runs and avoid parallel routing with mains wiring.
- Relocate the unit higher or try alternate channels if interference persists.
- Test at event volume so your sound stays stable under real conditions.
| Issue | Quick fix | Why it helps |
|---|---|---|
| Latency | Use low-latency codec or wired path | Tighter sync between voice and playback |
| Dropouts | Shorten distance; clear line-of-sight | Stronger RF link; fewer interruptions |
| Noise | Isolate power and use shielded cable | Reduces hum and static in the sound |
Preventing Feedback and Distortion in Home and Event Spaces
Preventing that sudden squeal starts with where you place gear and how you set levels before the room fills with sound.
Keep sources and pickup zones apart. Place speakers forward of the microphones and angle drivers away from mic pickup areas. This reduces the loop that creates feedback.
Start with low mic gain and raise the master volume slowly. That gives you headroom and helps avoid distortion when levels climb. If harsh ringing appears, lower levels immediately and reposition gear.
- Place speakers forward of the microphones and angle them away from pickup zones to prevent that piercing squeal.
- Start with lower mic gain and raise master volume slowly for more headroom.
- In living rooms or other home spaces with lots of hard surfaces, cut highs and dampen reverb for clearer sound.
- Hold handheld mics close and avoid pointing them toward any speaker microphone axis; keep safe distance from horns and tweeters.
- If feedback erupts, drop volume, reposition, then re-approach levels carefully.
For more technique on eliminating feedback, see eliminating microphone feedback.
Adapters, Cables, and Connectors You May Need
Adapters and short, well-made cables let pro gear play nice with compact playback systems. Know the ports on both devices before you buy parts. That saves time and avoids level mismatch.
Common pairings and when to use them:
- 3.5mm → 6.35mm: use when a small receiver has a 3.5mm out and the main unit accepts a larger jack. Prefer metal-bodied adapters for a snug fit.
- XLR outputs: pick XLR-to-XLR for pro runs, XLR-to-1/4 inch or XLR-to-RCA when the target device needs those connections.
- Short shielded cable runs reduce noise. Keep length under a meter when possible for quick event setups.
When to add a DI box or audio interface:
- Use a DI box to convert an unbalanced feed into balanced XLR for long runs or noisy venues. This cuts buzz and preserves level.
- Choose an audio interface when routing a mic into a computer or when you need clean line-level output for a small PA system.
- Always verify input and output labeling so you avoid feeding mic-level into a line-only port or vice versa.
| Source | Use | Quick pick |
|---|---|---|
| 3.5mm out | Into larger jack | 3.5→6.35mm adapter, short cable |
| XLR out | Pro input or mixer | XLR→XLR or XLR→1/4″ |
| Unbalanced line | Long run | DI box to balanced XLR |
Pack a small kit: a few quality adapters, a short shielded cable, and a DI box or compact interface will cover most venue surprises. Label parts so setup is faster next time.
Common Problems and Quick Fixes
A quick walk-through of power, cable seating, and indicator lights fixes most setup headaches. Below are fast, actionable checks you can do in minutes before show time.
No sound: power, mute, and jack checks
Start simple. Make sure all devices have power, batteries are charged, and any mute switches are off. Confirm the receiver’s light shows a stable link.
Reseat every jack and verify the receiver is plugged into the correct input on the main unit.
Intermittent audio: distance, obstructions, and channel changes
Shorten the distance between performer and the receiver. Remove metal objects and phones from the path. If the system supports it, change channels or bands to avoid interference.
Whistling or harsh audio: gain staging and placement
If you hear feedback or distortion, lower mic gain first, then reduce the master volume on the speaker. Move the transmitter or handheld away from drivers and angle the cabinet away from pickup zones.
- If pairing stalls, clear saved devices and try again; allow extra time before the event.
- For persistent problems, swap cables and try a different input or receiver output.
| Issue | Quick Fix | Why it helps |
|---|---|---|
| No sound | Check power, LED, reseat jacks | Confirms the basic connection |
| Dropouts | Shorten distance, change channel | Improves RF link and reduces interference |
| Feedback | Lower gain, move devices | Reduces acoustic loop and clipping |
Real-World Scenarios in the United States
Outdoor events need reliable radio links and smart placement for steady voice coverage.
Place the receiver up high on a stand and aim its antenna toward the performer. That helps keep distance stable and cuts dropouts.
Outdoor speeches and street performances
Street performers can pair a wireless mic with a portable unit for fast setup. Test for delay and adjust timing if you sing along with backing tracks.
Home karaoke and parties with bluetooth speaker
At home, simple pairing or an all-in-one bundle makes karaoke easy for everyone. Keep volume moderate and pick a compact kit for quick swaps.
Work meetings and classroom presentations
Use a lapel mic for hands-free delivery. Run the receiver into a small active unit for lower latency and clear sound in the back row.
- Carry a mic speaker kit and spare adapters for pop-up events.
- Always do a short voice test to check coverage before starting.
| Scenario | Best Gear | Quick Tip |
|---|---|---|
| Outdoor speech | UHF receiver + active amp | Mount receiver high, aim antenna |
| Street performance | Portable wireless bundle | Test delay; keep line-of-sight |
| Home party | All-in-one karaoke kit | Use simple pairing; moderate volume |
| Meeting / Classroom | Lavalier + small active unit | Feed receiver into speaker for low latency |
When to Upgrade Your System for Better Sound
When sound or range limits your events, consider stepping up gear. Integrated bundles and pro radio rigs cut setup time and improve reliability for live voice work.
Built-in bundles often ship with one or two wireless microphones that auto-pair with the playback unit. These kits simplify setup and sometimes add helpful effects like reverb for vocals.
Move beyond basic wireless for steadier performance
If delay or dropouts bother you, opt for UHF/VHF or modern 2.4GHz digital systems. A dedicated transmitter and receiver give better range and lower latency than most streaming links.
- Auto-pair bundles: fast setup, beginner friendly, good for small parties and classrooms.
- UHF/VHF or 2.4GHz systems: more consistent range and fewer interruptions; ideal for outdoor events and larger rooms.
- Pro kits: include XLR outputs for clean feeds into mixers and active units, plus stronger antennas for stability.
- Scalable systems: pick coordinated frequencies when multiple presenters perform.
- For mobile DJs and teachers: a true wireless microphone system reduces hassle and keeps shows running.
When you need faster pairing but higher reliability than basic streaming, pair a wireless mic system with an active speaker wireless output or feed the mixer’s XLR. This gives near-instant, dependable sound and less sync trouble.
| System Type | Strength | Best Use |
|---|---|---|
| Integrated bundle | Easy setup, effects | Parties, small meetings |
| 2.4GHz / UHF | Range, stability | Outdoor events, pro shows |
| Pro kit with XLR | Clean feed, low latency | Mixers, multi-mic rigs |
Conclusion
Key takeaway, finish with a short checklist that keeps your wireless rig steady and speech clear.
You now have three practical routes for pairing a microphone with a speaker: direct pairing, using a wireless receiver into an input, or bridging via a small audio receiver or mixer. Power each device, pair or cable carefully, set levels low, then run a quick voice test to avoid feedback and clipping.
Next steps: favor low-latency paths when sync matters, use an active system or mixer for multi-user events, and pack a few adapters and a short checklist. This keeps sound reliable for meetings, parties, and pop-up events across the United States.
FAQ
How can I hook up a mic to a Bluetooth speaker if the speaker has no mic input?
Use a wireless mic system with its receiver wired to the speaker’s line-in or use a small Bluetooth audio receiver that accepts 3.5mm or RCA input. For wired mics, connect through a mixer or an interface, then pair the mixer or receiver with the speaker. Always match levels and use proper adapters (XLR-to-TRS, TRS-to-3.5mm) to avoid noise.
What’s the difference between Bluetooth mic systems and UHF/VHF transmitters?
Bluetooth systems use standard consumer profiles and are easy to pair but often have higher latency and shorter range. UHF/VHF pro systems use dedicated RF channels, offer lower latency, longer distance, and multiple simultaneous mics with less interference. Choose based on range, reliability, and audio quality needs.
Which mic types work best for live voice: dynamic, condenser, or lavalier?
Dynamic mics handle loud sources and reject background noise, making them great for live voice. Condenser mics capture detail and need phantom power, ideal for controlled environments. Lavalier (lapel) mics offer hands-free use for presentations but may pick up clothing noise. Match type to the venue and speaker setup.
Why don’t many Bluetooth speakers have dedicated mic inputs?
Most consumer Bluetooth speakers target music playback and prioritize simplicity over pro audio features. Manufacturers often omit mic inputs to save cost and space. For vocal use, an active speaker or PA system with mic preamps is usually a better choice.
Can I pair a Bluetooth transmitter directly to a Bluetooth speaker for live vocals?
You can, but expect some audio delay and possible audio quality limits depending on the Bluetooth profiles supported. This works for casual karaoke or announcements, but not for situations that require tight lip-sync or real-time monitoring.
How do I wire a wireless mic receiver to a speaker safely?
Power all devices first. Use the receiver’s balanced XLR or TRS output to the speaker’s line-level input or to a mixer. Start with low gain on the receiver and low master volume on the speaker, then raise levels gradually while checking for distortion or feedback.
What adapters or cables might I need (XLR, 1/4″, 3.5mm, RCA)?
Common adapters include XLR-to-TRS, TRS-to-3.5mm, and RCA-to-TRS. For long runs, use balanced XLR or TRS to reduce noise. A DI box helps convert unbalanced outputs to balanced signals and matches levels between devices.
Will using a Bluetooth audio receiver introduce noticeable latency?
Yes. Typical consumer Bluetooth latency ranges from 100–300 ms, which can make live speaking or singing feel out of sync. Choosing low-latency codecs and keeping devices close can help, but professional RF or wired solutions remain best for minimal delay.
How do I set gain and volume to avoid distortion and feedback?
Start with receiver gain low and speaker/master volume low. Speak or sing at performance level while slowly increasing gain until sound is clear without clipping. Position speaker in front of mic to minimize feedback and use EQ to notch problem frequencies if needed.
What should I test before a live event?
Do a soundcheck: level set with “one-two-three” voice cues, walk-test for range and dropouts, check all battery levels, and verify pairing stability. Test with the same clothing and placement for lavalier mics to catch handling noise issues.
How can I reduce dropouts and interference outdoors or in crowded spaces?
Use pro RF systems with dedicated channels, place receivers away from Wi‑Fi routers and metal obstructions, and keep a direct line-of-sight where possible. For Bluetooth, reduce distance and remove nearby competing devices.
When should I upgrade from a Bluetooth setup to UHF/VHF or 2.4GHz digital systems?
Upgrade when you need longer range, multiple mics, lower latency, or consistent reliability in busy RF environments—common needs for events, houses of worship, or touring acts. Pro systems give better sound, channel management, and durability.
Can I use a small mixer to handle multiple mics and still send audio to a Bluetooth speaker?
Yes. Route mic outputs into the mixer, adjust EQ and levels, then use the mixer’s line output into a Bluetooth transmitter or into the speaker’s aux input if available. A mixer gives control over multiple inputs and effects like reverb.
What is the best placement for speakers and microphones to avoid feedback?
Keep speakers in front of and slightly below the mic capsule, angled away from the mic pickup pattern. Use directional mics (cardioid) pointed at the sound source and away from speakers. Reduce gain where feedback occurs and notch problem frequencies with EQ.
How far can I realistically expect wireless mic systems to work?
Consumer Bluetooth reliably works within 10–30 feet depending on obstacles. Professional UHF/VHF and some 2.4GHz digital systems can operate 100–300+ feet with clear line-of-sight. Check manufacturer specs and test on-site for best results.
What common quick fixes solve “no sound” issues?
Check power and batteries, confirm mics and receivers are paired and unmuted, verify correct input/output jacks, and inspect cables for damage. Swap cables or use another device to isolate the fault quickly.
Are there specific Bluetooth profiles or codecs I should look for to improve audio?
Look for aptX Low Latency, AAC, or SBC depending on source and speaker support. Low-latency codecs reduce delay; AAC can help with Apple devices. However, these profiles still fall short of professional RF systems for live use.


