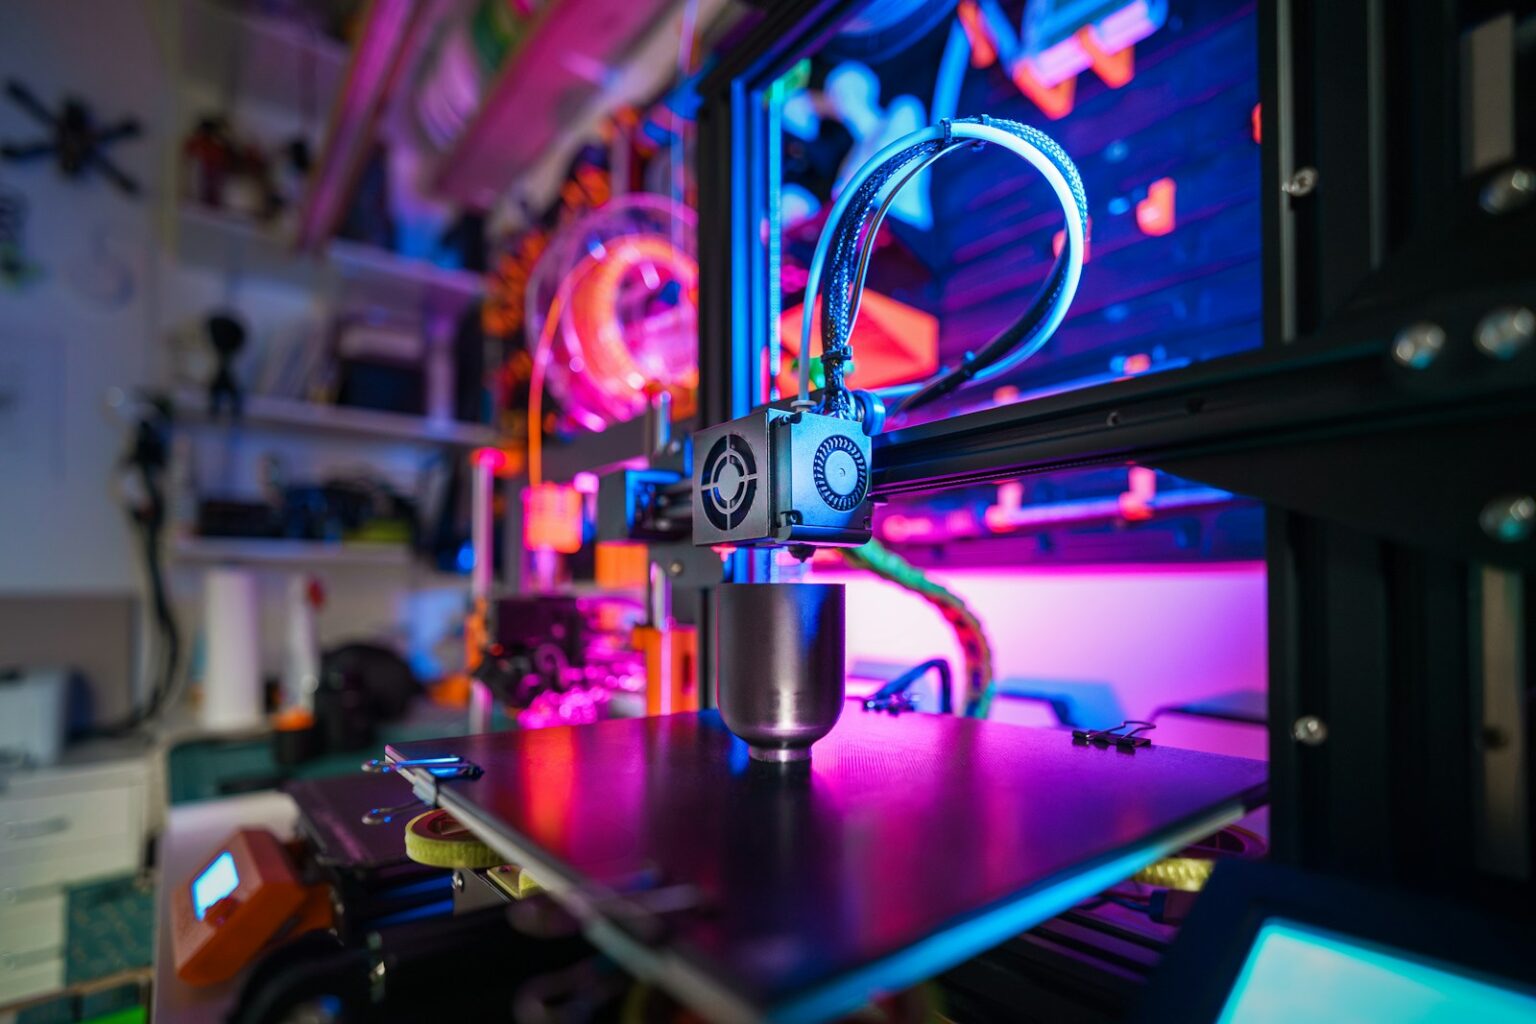
The Elegoo OrangeStorm Giga Review opens with a clear point: this is not a desktop toy. With an enormous 800 × 800 × 1000 mm build volume, the orangestorm giga changes what you can print in one pass.
Its flying-gantry Cartesian layout and heavy metal frame give an industrial feel. The assembled machine weighs about 104 kg and needs a lot of floor space, so plan for footprint and a sturdy surface.
The printer runs Klipper firmware with a removable Android tablet, plus LAN, Wi‑Fi, and USB options. Four heated PEI plates and a direct-drive hotend with a 0.6 mm high-flow nozzle suit large PLA and PETG parts, but they also raise power and heat needs.
Expect trade-offs: long hours for big models, higher filament use, and noticeable fan and room heat during operation. For a deeper technical tour and specs, see our linked summary here.
At a glance: What the OrangeStorm Giga is and who it’s for
Think big: a printer built to handle full-size parts without seam lines or assembly. The orangestorm giga offers an 800 × 800 × 1000 mm build volume that lets you print helmets, signs, props, jigs, or furniture pieces in a single pass.
Who should consider it: experienced makers and small shops that have the floor space and patience for large projects. It runs Klipper via a detachable tablet and includes LAN, Wi‑Fi, and USB for remote job control.
- Includes both a frame-mounted spool holder and a rolling 5 kg floor spool to support long filament runs.
- Filament runout sensor reduces risk on multi-day prints.
- Supports PLA and PETG with a 0.6 mm nozzle for a balance of speed and quality.
| Feature | Value | Why it matters |
|---|---|---|
| Build volume | 800 800 1000 mm | One-piece prints, fewer seams |
| Connectivity | LAN / Wi‑Fi / USB | Remote monitoring and easy file transfer |
| Spool options | Frame holder + 5 kg floor spool | Handles larger spools and long runs |
| Approx. MSRP | $2,500 | Industrial-scale size at a modest price |
Design and build: Frame, gantry, and massive build volume 800 × 800 × 1000 mm
The core of this large printer is a rigid metal skeleton and a flying gantry that keeps travel smooth across wide spans. That flying gantry Cartesian layout rides on linear guides on X and Y to maintain accuracy over the full 800 800 span.
Flying gantry cartesian layout and linear guides on X/Y
Long moves need steady bearings. Linear rails reduce flex and help the toolhead hold position during wide prints. That stability matters most when printing large faces or long bridges at scale.
Metal frame, corner brackets, and overall machine footprint and weight
The heavy-duty metal frame and robust corner brackets keep the machine square during long prints. The assembled footprint is roughly 1224 × 1204 × 1424 mm and the printer weighs about 104 kg, so plan for a sturdy surface or floor mounting.
Four-part heated bed and PEI spring steel plates: implications for seams
The bed uses four 410 × 410 mm magnetic PEI plates that remove quickly and ease part removal. Note: the seams form a cross-shaped join that can leave a faint scar on the underside of big prints.
- Plates heat independently for spot warming or together for full-bed jobs.
- Orient parts to hide seam artifacts or add a sacrificial skirt under critical surfaces.
- Check cable routing and gantry clearance during staging to avoid intrusions into the toolhead envelope.
| Feature | Why it matters | Practical tip |
|---|---|---|
| Linear guides (X/Y) | Stable long-range motion | Tighten and recheck fasteners after first setup |
| Metal frame & corners | Reduces wobble and ringing | Place on solid, level floor or bench |
| Four magnetic plates | Fast removal; seam imprint risk | Use surface treatments or hide seam areas |
Specs that matter: Nozzle, extrusion, cooling, and power
Key hardware—nozzle, heater, fans, and power—defines what speeds and materials the printer can handle. These parts set real-world limits on flow, temperature, and print speed for massive builds like 800 800 1000 projects.
Hotend and extrusion
The stock 0.6 mm brass nozzle supports up to 300 °C. It pairs with a titanium heat break and a 60 W ceramic heater to hold temperature under heavy flow.
A dual-gear direct-drive extruder helps maintain steady filament feed for thicker lines and bigger layer heights.
Cooling and fans
Cooling uses two 5015 blowers plus a 4010 axial fan. Intelligent fan control reduces noise by stopping fans after prints finish.
Power and practical speed
The machine runs five power supplies with a 1,530 W rating. At 120 V peak current can reach about 13 A, so a dedicated circuit is wise. Each extra printhead adds roughly 100 W.
Claimed top speed is 300 mm/s, but recommended and practical print speed for large parts sits around 150 mm/s and 120–200 mm/s respectively.
- Tip: tune temperature and cooling when you push flow. Bigger beads need both heat and targeted cooling to avoid weak layers.
| Spec | Value | Why it matters |
|---|---|---|
| Nozzle | 0.6 mm brass, 300 °C | High-flow for thicker layers and faster prints |
| Cooling | 2×5015 + 4010, smart stop | Targets part and hotend cooling; quieter idle |
| Power | 1,530 W total, ~13 A at 120 V | Requires circuit planning; extra heads add ~100 W each |
Setup and assembly: From forklift delivery to first power-on
Unboxing starts big. Freight delivery arrives on a pallet with two oversized boxes for the orangestorm giga. Have a helper and clear floor space before you move the crates. This saves time and keeps heavy panels safe.
What’s in the box: the base (the heaviest piece with five power supplies), two leveling plates with access holes, a USB drive with manuals and test prints, a detachable touchscreen tablet, standard and rolling 5 kg spool holder options, spare nozzles, metal Z-offset card, and a network cable.
Assembly is a two-box process and usually finishes in under two hours if you follow the video and manual. Start with a loose fit, square the frame, then fully tighten the metal corner brackets. Labeled connectors and drag chains make wiring easy.
- Check the voltage selector before first power-on and confirm the usb ports and screen power up.
- Plan your filament path early: choose the holder and avoid tight bends for smooth feeding.
- Leave access to front ports and the bed plates for quick removal and emergency stop reach.
Leveling and calibration: Manual + auto leveling on four plates
Leveling a very large bed takes patience, and the orangestorm giga pairs manual tweaks with a long auto-probe pass. Start on the two removable leveling plates so you can reach the 64 spring-mounted adjustment screws across the four heated plates.
Next, run the probing sequence. Firmware will perform between 100 and 121 point probes depending on settings. After probing, set your Z-offset with the included metal gauge card to lock in first-layer height.
64 screws, 100–121 point probing, and Z-offset technique
Expect a full session to take about two hours. Heating cycles and many probe points give the firmware a reliable baseline for a huge bed.
Common issues and practical tips
- Plate balance drifts—use consistent screw increments and recheck after cooldowns or room shifts.
- Perfect first layers are rare; aim for “good enough” adhesion and let the next few layers improve surface quality.
- Prep filament and surfaces: glue stick near seams, brims where needed, and place visible faces away from the cross seam.
Do quick checks before long prints and full recalibration after plate swaps or moves to save time and filament.
Elegoo OrangeStorm Giga Review: Print speed, quality, and reliability
Large-format printing changes how you judge speed and risk—what looks fast on paper can take days in practice. The orangestorm giga claims a 300 mm/s top end, but real-world large prints usually sit in the 120–200 mm/s sweet spot.
Real-world speed vs claimed numbers
Why the gap? Acceleration limits, cooling, and required flow mean you rarely run at headline speed for big jobs. A quick benchmark like a ~25-minute Benchy shows peak capability, while a full-bed Flexi Rex ran about 42 hours.
For a huge 800 1000 project, the 140-hour, 11 kg Tentacle Treasure Chest is a useful warning: time adds up fast and so does material cost.
Layer quality, ringing, and seam artifacts
The rigid frame and stable head keep ringing low even at thicker layers. That helps when you push flow through a 0.6 mm nozzle to cut hours.
Watch the bed seam: the four-part plate can leave a cross-shaped imprint on underside faces. Reorient parts or use slicer offsets to hide seams on show surfaces.
Days and hours of printing: risk management
Long jobs demand checks. Pause to verify first layers, monitor remotely, and break massive ideas into subassemblies to reduce damage and filament waste.
- Use controlled flow tuning to keep corners fed and details sharp at higher speed.
- Black pla hides some layer lines but can also highlight surface texture under light.
- TPU prints are possible but run slower to avoid under-extrusion.
For detailed long-format testing and timing examples, see our full testing notes here.
Materials and temperature: PLA, PETG, TPU, and beyond
Material choice and temperature tuning become mission-critical for very big parts. The orangestorm giga handles common materials—PLA, PETG, TPU—and higher-temp filaments up to the 300 °C nozzle limit. The bed tops out near 100 °C, so plan accordingly for warpage-prone plastics.
Black PLA and bulk spools: flow, temperature tuning, and cooling
Black PLA often hides layer lines but needs careful flow tuning. Use a slightly higher extrusion multiplier and moderate temperature to improve sheen without softening detail.
Bulk 3–5 kg spools are practical for 800 800 jobs. Keep them free-wheeling on the floor spool and trust the runout sensor for long runs.
TPU and higher-temp filaments up to 300 °C: success factors
TPU prints well if you slow speeds, keep a smooth filament path, and use conservative acceleration. Expect some stringing but good final parts when tuned.
- Default temps (start): PLA 200–210 °C; PETG 240–250 °C; TPU 210–230 °C.
- Use thicker layers with the 0.6 mm nozzle for strength, but balance with targeted cooling to keep edges crisp.
- Dry sensitive filaments and shield the build from drafts to avoid edge lifting on large plates.
| Material | Nozzle temp | Bed temp / tip |
|---|---|---|
| PLA | 200–210 °C | 50–60 °C; add brim for large flats |
| PETG | 240–250 °C | 70–80 °C; reduce part cooling |
| TPU | 210–230 °C | 30–50 °C; slow feed, smooth path |
Software, firmware, and connectivity: Klipper, tablet UI, and LAN/Wi‑Fi
Connectivity and firmware quirks matter most when a single part can take days to print. The orangestorm giga ships with a vendor fork of Klipper, but you can reflash to vanilla Klipper for broader plugin compatibility and community support.
What to expect: some users saw issues between Mainsail and the bundled tablet on older builds. Recent updates improved stability, so keep firmware current.
Tablet, USB access, and webcam
The detachable Android tablet is responsive but the short cord favors mounting near the base. There’s a front usb for quick transfers and a protected internal USB in the right column for safer connections.
Web UI, monitoring, and mid-print controls
LAN/Wi‑Fi access gives a web interface to watch temps, live mm/s reports, and adjust speed, flow, or bed heat while printing. Add a webcam to catch early faults and pause before wasted filament.
- Keep a firmware checklist: backup configs, update Klipper, and test Mainsail or your chosen UI.
- Store PLA and filament profiles so switching projects stays fast and predictable.
| Feature | Where | Why |
|---|---|---|
| Network | LAN/Wi‑Fi | Remote job control |
| Ports | Front & internal USB | Convenience + protection |
| Adaptive speed | Klipper | Balance head motion on 800 1000 spans |
User experience: Noise, heat, spool management, and daily handling
A big printer changes routine: expect louder startups and noticeable room warming. Multiple undercarriage fans create a low roar at power-up and during long runs. That same airflow raises room temperature by about 5 °F on prolonged jobs.
Power planning matters. The machine’s 1,530 W rating can trip a shared 15 A circuit. Use a dedicated circuit to avoid nuisance trips and keep heaters, motors, and fans running steadily.
Fan noise and room heat rise—why placement and power matter
Place the unit away from living areas and bedrooms. Proper ventilation and a stable power source reduce complaints about noise and heat.
Spool holder choices, runout sensor, and filament path
The included floor 5 kg spool holder handles large rolls well. The frame-mounted option keeps spools higher and more compact. Both work with the filament runout sensor to rescue long prints when a roll runs out.
- Smooth filament paths: avoid sharp bends and use good guides to cut drag and under-extrusion.
- Protect low ports: the front usb and tablet are handy but can be vulnerable; use the internal protected usb for critical connections.
- Keep spare bearings and clean spool bearings to reduce friction over long prints.
| Area | Pros | Cons |
|---|---|---|
| Floor spool | Holds 5 kg rolls, stable | Long filament path risk |
| Frame-mounted holder | Shorter path, tidy | Limits spool size |
| Power | Dedicated circuit ensures stability | Shared circuit may trip |
Daily handling tips: clear the area for plate swaps, secure cables out of traffic, and use two people for heavy lifting. Run routine checks on fans, vents, and feeder smoothness. These small habits cut failures and keep big-format printing pleasant.
Cost of ownership: Filament usage, energy draw, and potential damage risks
When prints span hundreds of hours, energy and material costs quickly eclipse the printer’s sticker price. Plan for kilograms of filament and continuous power use before you hit print.
Filament by the kilogram: flow rate meets budget reality
Real-world tests show single projects consuming ~11 kg of filament. Wide lines and taller layers multiply filament use fast.
Buy bulk 3–5 kg spools and track remaining material. That reduces mid-job surprises and lowers per-kg costs.
Power, speed ambitions, and the cost of failed prints
The machine’s 1,530 W rating adds up over days. At local kWh rates, long jobs can add tens of dollars per print in electricity.
Failed prints waste filament and days. One tester reported a $60 loss from a mid-job failure. Dial back maximum mm/s to cut failure risk.
- Verify bed and plate cleanliness and temperature before long runs.
- Run plate-safe test coupons to validate adhesion and flow.
- Use a reliable spool holder and monitor spool changes to avoid runouts.
| Cost area | Real-world impact | Mitigation |
|---|---|---|
| Filament | Single large prints ≈11 kg; hundreds of dollars over tests | Bulk spools, diameter-controlled brands, pre-calc kg per job |
| Power | 1,530 W draw; noticeable kWh over multi-day jobs | Estimate run hours × kW × local rate; use dedicated circuit |
| Failure risk | Days lost and material waste; example $60 failed job | First-layer checks, early monitoring, conservative speeds |
Alternatives and who should buy this giga printer
Choosing between one giant printer or several smaller units hinges on your workflow and space. If you need true one-piece parts at 800 × 800 × 1000 mm, the orangestorm giga is a clear fit. It requires room, a strong power base, and a plan for heavy filament use.
When to choose Neptune 3/4 Max, Creality K1 Max, or Prusa XL
Neptune 3/4 Max suits users who want large prints without the Giga’s footprint or cost. It hits a sweet spot for occasional big jobs.
Creality K1 Max is better if technical materials and an enclosed volume for ABS matter. Its 300 × 300 mm enclosure helps with warp-prone parts.
Prusa XL targets professionals who want premium multi-toolhead workflows rather than sheer size. It’s modular and refined but pricier.
Multi-nozzle upgrade vs buying multiple printers
The giga supports synchronized heads up to four units, adding roughly 100 W per nozzle. That boosts identical-part throughput but increases noise, power draw, and complexity.
Running multiple smaller printers can be cheaper, quieter, and easier to maintain for mixed jobs. Choose a quad-head upgrade if you mostly print repeats; choose a printer farm for varied materials, parallel jobs, or lower per-unit risk.
- Best buy the giga if you often need single-piece, massive builds like signage, props, or furniture components.
- Pick smaller machines for tighter spaces, lower energy budgets, or frequent material swaps.
- Balance filament logistics, turnaround time, and noise when deciding between one base system or several units.
| Option | Strength | When to pick |
|---|---|---|
| Giga (single) | Huge build; single-part prints | One-piece large parts, available space/power |
| Multiple midsize printers | Redundancy; lower noise | Mixed jobs, cost-conscious throughput |
| Quad-head upgrade | Simultaneous copies | High-volume identical parts, willing to manage power/noise |
Conclusion
For shops that prioritize single-pass large parts, this platform reshapes workflow and expectations.
The orangestorm giga pairs an 800 800 1000 workspace with a high-flow 0.6 mm nozzle, Klipper tablet control, and robust linear motion to make one-piece printing practical. Real-world speeds sit around 120–200 mm/s, and many showcase jobs take hours or even days to finish.
Success depends on careful leveling across four heated plates, a dedicated power circuit for the 1,530 W draw, and planning for kilograms of filament. Treat the first layer as mission-critical to avoid costly restarts.
If you print truly large parts often, this machine can remove seams and speed production. If your work is usually smaller, consider a quieter, simpler alternative that fits daily needs and saves time and material.
FAQ
What build volume does the OrangeStorm Giga offer and what kind of projects suit it?
The machine provides an enormous 800 × 800 × 1000 mm envelope, making it ideal for large prototypes, architectural models, cosplay armor, and multiple-part batch runs. Its size favors shop or studio use rather than casual desktop printing due to footprint, power draw, and handling of long print times.
How difficult is assembly and what tools or help are needed?
The printer ships in two boxes with hardware, levelling plates, and a few tools. Two people are recommended for safe unpacking and placement. With the manual and video, assembly commonly takes under two hours for an experienced builder; plan more time for first-time users to adjust and calibrate.
What type of bed does it use and are there seam issues across the four plates?
It uses a four-part heated bed with PEI-covered spring steel plates. The multi-plate layout allows thermal control and modular replacement but can produce visible seams between plates unless you carefully level and tune first-layer settings and Z‑offset.
Which nozzle and hotend specs affect high-flow printing?
The machine ships with a high-flow 0.6 mm nozzle and a titanium heat break paired with a 60 W heater. This combo helps sustain steady melt flow for faster print speeds and larger layer heights, but you’ll need tuned extrusion and cooling to avoid blobbing or under-extrusion on long prints.
What print speeds are realistic for quality large prints?
While the manufacturer claims up to 300 mm/s, expect practical speeds between 120–200 mm/s for a balance of quality and reliability on large parts. High speeds reduce print time but increase risk of ringing, layer issues, and filament flow inconsistencies.
How does the cooling system work for different filament types?
The printer uses a dual fan setup (5015 + 4010) with intelligent control to balance part cooling and hotend ventilation. PLA benefits from stronger part cooling, while PETG and TPU need reduced fan speeds and tuned bridge/perimeter cooling to avoid warping or poor layer adhesion.
Which materials can it reliably print and what temperatures are supported?
The machine handles standard PLA and PETG well, including bulk black PLA spools. TPU works with proper path tuning. The hotend supports higher temps—up to around 300 °C—so many higher-temp filaments are possible, though print surface adhesion, cooling, and enclosure heating may require adjustments.
How is leveling handled and how often will I need to recalibrate?
Leveling combines manual adjustment with multi-point auto probing across the four plates (up to 121-point probing). You’ll still need to check plate balance and Z-offset periodically, especially after large prints or if the bed sees temperature cycles.
What power and electrical considerations should I know about?
The system uses multiple power supplies with a combined rating around 1,530 W. Ensure your workspace wiring and circuit breakers can handle sustained loads. Placement matters to manage room heat and avoid tripping circuits during long, high-temperature prints.
What connectivity and firmware options exist?
It runs a Klipper-based firmware fork with a touchscreen tablet UI. Users can switch to a vanilla Klipper setup or use Mainsail. USB and LAN/Wi‑Fi connectivity support local file loads and webcam monitoring; confirm preferred network and software setup before long remote jobs.
How noisy is the printer and how does it affect room temperature?
Fans and motion will produce noticeable noise, especially at high speeds. The large heated bed and prolonged runs can raise room temperature; consider placement in a well-ventilated area or dedicated workshop to manage heat and noise.
What spool holder and filament management options are available?
The printer supports different spool holder options, including on-frame and external mounts. A filament runout sensor is available; for long jobs use bulk spools and a stable filament path or dry box to avoid moisture-related print failures.
What are common print quality issues on very large prints and how can I mitigate them?
Large prints face seam artifacts at plate joins, ringing from high accelerations, and layer adhesion drift over long hours. Mitigate by reducing accelerations, tuning flow and retraction, increasing infill/skin thickness, and splitting models or adding chamfers where needed.
How much filament and energy should I budget for big builds?
Filament consumption scales quickly with part size—kilograms per part are common. Energy draw is significant due to the large heated bed and long runtime. Plan material and electricity costs into project timelines and consider failed-print risk when estimating budget.
Can I monitor prints remotely and add webcam surveillance?
Yes. The onboard connectivity supports webcam monitoring and remote control via networked Klipper interfaces. A stable LAN/Wi‑Fi connection and a dedicated camera make supervising multi-day prints much safer and more convenient.
What maintenance and wear parts should I keep on hand?
Keep spare nozzles (including 0.6 mm and other sizes), PTFE tubing, bed plates, and fans. Regularly inspect linear guides, belts, and the heated bed for wear or damage. Stocking common consumables reduces downtime for multi-day prints.
Who should consider buying this printer and what are alternatives?
This printer suits small manufacturers, studios, and serious pros who need large-format single-piece prints. Alternatives to evaluate include the Neptune 3/4 Max, Creality K1 Max, and Prusa XL for different balances of size, ecosystem, and multi-head strategies vs running one very large machine.


