Notice a warm, cream, or amber cast on your display? That odd tint can come from simple settings like Night Light or other blue-light filters. It can also point to incorrect color profiles, outdated drivers, or a hardware fault such as a faulty cable or, in rare cases, a swollen battery that distorts the panel.
- What this guide covers: fixing a yellow tint on a Surface Laptop 4 display
- Quick checks before deep troubleshooting
- Common causes of a yellow screen on Windows
- Disable Night Light and other blue light filter features
- Adjust color settings and calibrate the display
- Surface Laptop 4 Yellow Screen Issue: driver fixes
- Using an external monitor? Rule out cable and peripheral causes
- Hardware red flags and when to seek repair
- Preventive tips to keep colors accurate over time
- Conclusion
- FAQ
- Why does my device show a yellow tint?
- How do I quickly check if the tint is caused by software?
- How do I turn off Night Light in Windows?
- Can color calibration fix a yellow screen?
- What driver steps should I try for color problems?
- Could an external monitor connection cause a yellow tint?
- When is the yellow tint likely a hardware problem?
- Should I try reinstalling the operating system for color issues?
- What preventive steps keep colors accurate over time?
- When should I contact a repair professional?
Most causes are easy to fix. We’ll start with quick checks in settings, confirm the behavior across apps, and turn off any light filters. If software steps don’t help, we’ll look at driver updates, calibration, and testing external cables.
By the end, you’ll know how to tell a content-related color shift from a system-wide display change. You’ll learn which red flags suggest service is needed and how to restore a natural white point without losing eye comfort.
What this guide covers: fixing a yellow tint on a Surface Laptop 4 display
This guide lays out a clear, step-by-step approach to find and remove a warm tint on your screen. Start with fast checks, then move to advanced adjustments if needed.
What’s included: turn off any blue light filter, check display settings and color profiles, run Windows color calibration, and update or roll back graphics drivers to resolve issue efficiently.
No special tools or risky disassembly are required at first. You won’t need third-party utilities until built-in Windows options are tried.
- Test with Windows default backgrounds and multiple apps to see if the display tint is system-wide or content-related.
- If using an external monitor, try reseating cables and swapping ports to rule out a loose connection or bad cable.
- Learn hardware red flags—like panel bulging or persistent tint—that mean it’s time to contact support or a qualified technician.
Accessibility and comfort settings are also covered so you can balance eye comfort and accurate color. Follow these steps to fix yellow and restore natural tones or to know when to seek repair.
Quick checks before deep troubleshooting
A few quick checks often reveal whether the tint comes from content or the system. Start here to rule out easy causes before changing drivers or calibration.
Confirm it’s not content-related
Open Settings and apply a default Windows background with large neutrals. Use built-in images and system dialogs to see if the screen still looks warm.
If only certain websites or apps look tinted, disable any reading modes or page- tinting extensions that reduce eye strain.
Reboot and let the display cool down
Restart the device to clear transient states. Heat can affect panel behavior, so power it off briefly and let it cool if colors improve after a rest.
Test in different ambient light
Move to a brighter room or switch on a cool white lamp. Automatic brightness or adaptive color features can alter how the display and colors appear under different light and temperature conditions.
- Check if taskbar and system dialogs show a uniform tint — that suggests a global color setting.
- Temporarily disable HDR or adaptive brightness to confirm stability.
Common causes of a yellow screen on Windows
A warm cast often has a clear and fixable origin tied to settings or drivers.
Start with software and simple connections. Many users find that a blue light filter or reading mode intentionally warms whites to reduce eye fatigue. Custom color profiles, a shifted color temperature, or misapplied ICC files can also make the whole display appear too warm.
Software and color profile causes
Night Light and similar filters tint whites toward amber during evening hours. Check built-in and OEM eye-comfort apps first.
Incorrect color settings or a warm color temperature from calibration tools can cause a steady cast across apps and system dialogs. Reset profiles if colors look wrong everywhere.
Drivers, cables, and hardware
Outdated or corrupt graphics drivers may change gamma, white balance, or profiles, especially after OS updates. Roll back or update drivers if the tint began after a change.
When using an external monitor, a loose or damaged cable can drop a color channel and produce a yellow effect. Finally, panel backlight faults or graphics hardware problems can create a persistent warmth that software fixes won’t remove.
- Check filters and profiles first.
- Test with another cable or monitor port.
- Update or roll back GPU drivers as needed.
| Cause | How it appears | Quick check | Next step |
|---|---|---|---|
| Blue light filter / Night Light | Evening-only warm tint; whites look cream | Toggle filter off in Display settings | Disable or reduce intensity |
| Incorrect color profile | Steady warm cast across apps | Open Color Management and reset profile | Use default or calibrate |
| Drivers (outdated/corrupt) | Tint after updates; inconsistent color | Check Device Manager for driver status | Update, reinstall, or roll back driver |
| Cable / monitor / panel hardware | Missing blue channel or uniform warmth | Swap cable/port or try external monitor | Repair or replace faulty hardware |
Disable Night Light and other blue light filter features
Before diving into drivers and calibration, turn off any active blue-light filters. Night modes intentionally warm the display to reduce eye strain, and that warmth often looks like a yellow tint.
On Windows 11, open Settings > System > Display, pick Night light, then toggle it Off or lower its intensity. This returns whites closer to neutral while keeping evening comfort if needed.
Windows 10 steps
Press Win+I, type “Night light” in the search box, open the result, and switch it Off. That simple change removes the intentional warm tone that can make the screen look yellow.
Check OEM and third-party apps
Review vendor tools like Dell ComfortView, HP Eye Ease, Lenovo Eye Care, or apps such as f.lux. These can override system settings and add an extra light filter.
- Reduce filter strength or schedule it only for late hours to keep daytime colors accurate.
- Temporarily disable browser reading modes or extensions to avoid double-stacking filters.
- Check other user accounts so a per-user filter feature isn’t still active.
| Where to check | What it does | Quick action |
|---|---|---|
| Windows 11 Night light | Warms whites to cut blue light | Settings > System > Display > Night light: Off or lower |
| Windows 10 Night light | Applies scheduled warm tint | Win+I, search “Night light”, turn Off |
| OEM / third-party apps | May override system color controls | Open app, disable filter or reduce intensity |
Adjust color settings and calibrate the display
Small changes to color controls often remove an unwanted warm tint without advanced tools. Start with Windows’ built-in tools to set gamma, contrast, and balance so whites look natural again.
Run Windows Display Color Calibration
Type Calibrate in Start and open Display Color Calibration. Follow the guided steps to set gamma, brightness, contrast, and color balance.
Work in steady, neutral room light and use the suggested reference images. The wizard helps achieve better color calibration and can remove a persistent warm cast.
Reset color profiles and GPU color controls
Open Color Management and remove any custom ICC profiles that may cause an incorrect color bias. Then revert to system defaults and recheck grayscale rendering.
Next, launch your GPU control panel (Intel Graphics Command Center, AMD Software, or NVIDIA Control Panel) and reset color channels to default. Slider overrides or per-display tweaks often produce a steady warm tone.
- Calibrate each display individually if you run multiple screens.
- Avoid copying profiles between different panel models; that can make colors inaccurate.
- After changes, restart or sign out to ensure new display settings load across apps.
| Action | Result | Quick tip |
|---|---|---|
| Display Color Calibration | Sets gamma, balance, and contrast | Type “Calibrate” in Start and follow prompts |
| Reset ICC profiles | Removes old color biases | Use Color Management to delete custom profiles |
| Reset GPU controls | Clears per-display overrides | Open vendor control panel and restore defaults |
Surface Laptop 4 Yellow Screen Issue: driver fixes
If colors shifted after a Windows update, the graphics driver is a likely cause. Start with simple driver actions before moving to hardware checks.
Update via Device Manager: In Windows, open Device Manager, expand Display adapters, right-click your adapter and choose Update driver. Let Windows search automatically to fetch newer software that may restore neutral color rendering.
Roll back if the tint began after an update. If the warm cast appeared right after a recent driver install, use the Roll Back Driver option to undo the change. That often returns gamma and white balance to the previous, correct state.
Install the OEM package when needed. If automatic updates don’t help, download the latest approved graphics package from the device maker and install it manually. OEM drivers include panel-specific fixes that can resolve screen and display problems a generic driver misses.
- After installing or rolling back, restart and test whites on default backgrounds and a grayscale ramp to confirm the color shift is resolved.
- Open the GPU control panel and reset any custom color tweaks that may reapply on first launch.
- Set driver updates to notify rather than auto-install so you can defer an update known to cause issues.
| Action | When to use | Expected result | Next step |
|---|---|---|---|
| Device Manager: Update driver | No recent changes; search for new fixes | Installs latest compatible driver | Restart and check display whites |
| Roll back driver | Tint started after a recent update | Restores previous color behavior | Test grayscale and default wallpapers |
| OEM graphics package | Windows Update finds nothing suitable | Installs vendor-tuned driver and fixes | Reset GPU controls and reboot |
Using an external monitor? Rule out cable and peripheral causes
External displays often reveal whether a cable or port is to blame for odd colors. Start with simple physical checks before changing drivers or calibration settings.
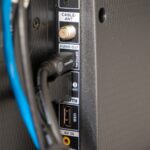
Inspect and reseat connections. Power down, unplug, and reseat both ends of your HDMI, DisplayPort, or USB-C cable. Look for bent pins, frayed shielding, or a loose fit that could drop a color channel and create a yellow tint.
Swap in a known-good cable and switch ports on the monitor and host device. If the warm cast follows the cable, you’ve found the cable cause. If it stays on the same monitor, test that monitor with another computer to isolate the problem.
- Bypass adapters or docks to rule out intermediate hardware faults.
- Reset the monitor’s color mode to default or sRGB; presets can warm the image.
- For discrete graphics, confirm the correct output path and check the graphics card control panel for per-port color overrides.
| Action | Result | Quick tip |
|---|---|---|
| Reseat cable | Fixes loose contact | Power down first |
| Swap cable/port | Identifies cable cause | Use known-good cable |
| Test on another device | Isolates monitor vs. host | Compare images under same light |
Hardware red flags and when to seek repair
Inspect the screen frame closely — a subtle lift or uneven seam can mean the battery is pushing against the display. If you notice a bulge, stop using the device and power it down. A swollen battery can warp the panel and change how the backlight diffuses color.
Localized discoloration or persistent patches that stay after resets and driver checks point to a panel or backlight problem rather than software. If the warm cast shows across all user accounts, profiles, and external outputs, consider a GPU or display fault.
Signs that indicate a serious hardware problem
- Edges that lift or gaps that grow when the device warms up.
- Yellow patches or uneven color that do not respond to calibration.
- Unusual heat near the battery, popping glass, or pressure-related color shifts.
The display assembly is glued with double-sided adhesive. Removing it needs controlled heat, T3 Torx and other precise drivers, and care to avoid cracking the digitizer. DIY attempts often cause more damage and can take hours even for trained techs.
If you see bulging, rapid color changes, or feel excessive temperature near the cell, power down, stop charging, and contact Microsoft support or a qualified repair shop. Professional service reduces risk and ensures correct replacement of parts and safe handling of swollen batteries.
| Visible sign | Likely cause | Recommended action |
|---|---|---|
| Bezel lift / bulge | Battery swelling | Power off, stop charging, seek professional repair |
| Persistent color patches | Panel/backlight aging or damage | Do not attempt adhesive removal; contact service |
| Uniform warm cast after all checks | GPU or display hardware fault | Document symptoms and get OEM diagnostics |
Preventive tips to keep colors accurate over time
A few simple routines will help your display stay true to color over time. Good habits prevent drift and reduce the need for troubleshooting later.
Night Light and scheduling: Use Night Light at a mild intensity or keep it disabled for color-critical work. Schedule it so evenings stay comfortable without shifting your daytime white point.
Recalibrate regularly: Run Windows Display Color Calibration every few months and after major updates to keep color calibration consistent.
- Do not run a blue light filter plus a third-party tool and browser reading modes at the same time.
- Keep the monitor on a neutral mode like sRGB when you need colors accurately; enable warmer presets only when desired.
- Check for driver updates selectively and review release notes before installing.
- Clean the screen with a microfiber cloth and mild cleaner and keep ambient light steady to judge neutrality better.
| Tip | Why it helps | Quick action |
|---|---|---|
| Moderate Night Light | Reduces blue without permanent shift | Set intensity low and schedule evenings |
| Periodic color calibration | Fixes drift and resets color profiles | Run Windows calibration every 2–3 months |
| Avoid stacked filters | Prevents double warm bias | Use one light filter tool at a time |
| Neutral preset (sRGB) | Maintains consistent tones for accurate work | Choose sRGB or standard mode in display settings |
Conclusion
Start your troubleshooting with a simple, ordered checklist to avoid unnecessary repairs. Turn off any blue light filter, check neutral content and default profiles, and confirm whether the warm tint stays across apps.
Careful color calibration and sensible color temperature targets often fix yellow tint without special tools. Reset color settings, run Windows calibration, and avoid stacking filters.
Keep drivers current but roll back a recent driver if the tint began after an update. Install OEM graphics packages when Windows Update has no fix. For external displays, test a second cable and port to rule out a cable cause.
If a laptop screen shows bulging, cracking sounds, or a uniform yellow screen that resists all software steps, seek professional service. Hardware faults and swollen cells need trained repair due to glued assemblies.
Maintain steady settings, recalibrate periodically, and use one light filter at a time to keep colors natural and reduce future issues.
FAQ
Why does my device show a yellow tint?
A yellow tint can come from a blue light filter like Night Light, an incorrect color profile, outdated graphics drivers, a loose external cable, or a hardware fault in the panel or GPU. Start with software checks — they’re quickest to fix.
How do I quickly check if the tint is caused by software?
Open built-in system backgrounds or a neutral test image, disable any blue light features, reboot, and test in different ambient light. If the tint persists across those steps, move on to color calibration and driver checks.
How do I turn off Night Light in Windows?
On Windows 11 go to System > Display > Night light and toggle Off or reduce intensity. On Windows 10 search “Night light” in Settings and switch it Off. Also check any OEM or third-party eye comfort apps and disable them.
Can color calibration fix a yellow screen?
Yes. Running the Windows Display Color Calibration tool and resetting color profiles or GPU color controls to default often corrects tints caused by mismatched settings.
What driver steps should I try for color problems?
Update the graphics driver via Device Manager, or install the latest OEM driver package. If the tint appeared after an update, try rolling back the driver. Reboot after each change to verify results.
Could an external monitor connection cause a yellow tint?
Yes. A faulty or loose cable, bad adapter, or damaged port can shift colors. Inspect and reseat the cable, then test with a known-good cable and port to rule out peripherals.
When is the yellow tint likely a hardware problem?
If the tint stays after disabling filters, recalibrating, reinstalling drivers, and testing external displays, it may be a panel defect, GPU issue, or battery swelling affecting the screen. Visible bulges or uneven discoloration are red flags.
Should I try reinstalling the operating system for color issues?
Reinstalling the OS is a last resort. Try drivers, calibration, and testing first. If you still suspect software corruption after backups and other steps, a clean OS install can confirm whether software is the cause.
What preventive steps keep colors accurate over time?
Keep graphics drivers and OEM display packages updated, calibrate periodically, avoid stacking multiple color filters, and schedule Night Light only when needed. Handle the device carefully to prevent physical screen damage.
When should I contact a repair professional?
Seek repair if the tint remains after thorough software and cable checks, if you spot screen bulging, or if you aren’t comfortable opening or replacing components. Certified technicians can safely diagnose panel or GPU failures.