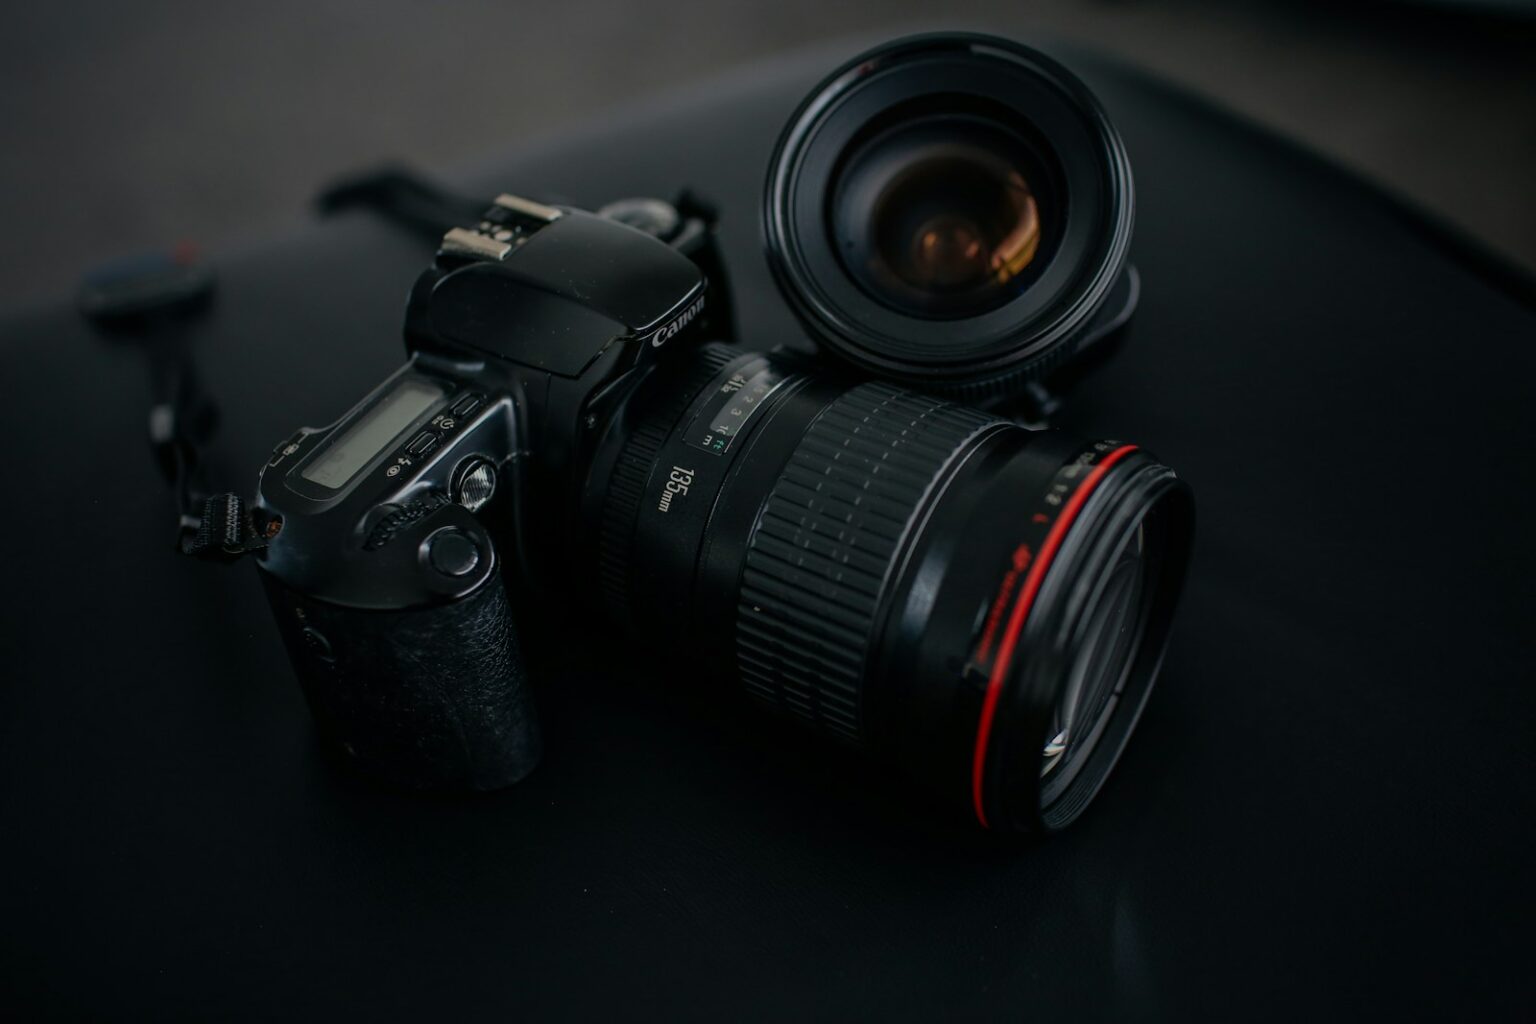
Short answer: modern digital shooting rarely needs a clear glass in front of the optics to improve image quality. Most cameras and modern coatings handle ultraviolet light and haze, so the main benefit of a filter today is simple protection, not a dramatic sharpness boost.
Think of a cheap filter as a sacrificial layer you can replace after sandy, salty, or dusty trips. That approach can save money and stress when a beach spray or trail dust threatens your gear. A hood often protects as well without adding extra glass.
We’ll weigh pros and cons so photographers can choose by scene. Expect practical tips on when an extra glass helps and when it causes flare under bright point lights or backlit setups. Later sections cover buying standards, care, and brand examples like B+W and Hoya to help you pick the right accessories for your camera and shooting style.
Modern reality check: Do UV filters still matter on today’s digital cameras?
Modern sensors, paired with advanced coatings, remove much of the ultraviolet sensitivity that used to matter. Film needed filtration to fight haze and color cast. Digital cameras and many contemporary optics already block most ultraviolet light, so routine filtration is often unnecessary.
That said, the current consensus in photography points to a situational approach. A filter can provide cheap, replaceable protection against sand, sea-spray, and sweaty travel. In most daytime scenes the measurable impact on image quality is minimal.
Adding one more air-glass surface can introduce reflections, flare, and slight drops in contrast in tricky lighting. For night shoots or backlit urban frames, removing the filter usually preserves tonal contrast and reduces ghosting.
A hood offers a safer default: it protects the front element and boosts contrast without extra reflective surfaces. Test your own camera and glass—different combinations behave differently. Adopt a practical pros and cons mindset and use a filter selectively when the environment demands it.
- Keep a filter for rough travel, beaches, and chaotic events.
- Remove it for night scenes or shots with bright point lights.
- Prefer a hood as the everyday protective tool.
What a UV lens filter actually does to light and your images
In the film era a simple glass could cut blue haze; modern sensors and coatings make that effect far smaller.
From film-era haze control to modern sensor behavior
Historically, ultraviolet on film added a blue cast and loss of distant contrast. Filters designed to block that band helped landscapes look cleaner.
Today many digital systems and the camera lens itself already limit high-frequency ultraviolet. That removes the big color shifts film once showed.
How extra glass and coatings interact with the optical chain
Every extra glass surface can reflect a bit of light and lower contrast. Add a filter and you add two surfaces to the optical chain.
High-quality optical glass with multi-coatings or nano/AR layers improves transmission and cuts internal reflections. Cheap, uncoated pieces can cause flare, ghosting, or softening of fine detail, especially at long focal lengths.
- Expect subtle, scene-dependent changes rather than dramatic shifts.
- Humid, high-altitude, or very bright conditions can still show modest haze differences at distance.
- Test your own camera and lens combinations to see how coatings interact with a particular filter.
Pros of using a UV filter: protection and potential clarity gains
Many photographers keep a clear filter as a replaceable shield against everyday hazards. It serves as a simple, sacrificial barrier that takes the wear so the primary glass stays intact.
Physical protection is the main advantage. A filter can stop dust, dirt, fingerprints, sea-spray, and minor knocks that might otherwise cause damage or scratches to a camera lens or front element.
Field cleaning is easier with a removable filter. Wiping a clean filter in rain or mist risks less than rubbing a coated element. That habit helps preserve resale value of expensive equipment over time.
- Faster, cheaper replacement vs. front-element repair.
- Some shooters see slight clarity gains at long distance in humid or high-altitude conditions.
- Pairing a hood with a filter adds rim protection without extra complexity.
- Premium brands like Hoya, B+W, ZEISS, Tiffen, PolarPro and Kase keep optical quality high while offering durable protection.
| Benefit | Practical Impact | When to Use |
|---|---|---|
| Scratch & knock resistance | Prevents costly repairs | Travel, hiking, beaches |
| Easy field cleaning | Quicker recovery after mist or spray | Rainy or coastal shoots |
| Minor haze reduction | Improved distant contrast in some scenes | Humid, high-UV, high-altitude days |
Cons of a UV filter: when extra glass can hurt image quality
Adding glass to the optical path increases the number of reflective surfaces. That extra surface raises the chance of flare and ghosting when bright point lights or backlight are present.
Flare and ghosting with bright point lights, backlight, and night scenes
City lights, stage rigs, and sunset backlight reveal reflections between elements. These artifacts lower contrast and can smear micro-detail on highlights.
Remove the filter for night work or long exposures to preserve clarity and prevent unwanted streaks and ghosts.
Vignetting and stacking issues on wide angles
Stacking a circular polarizer or neutral density on wide focal lengths can darken corners and soften edges. More elements means more risk of mechanical or optical vignetting.
Often unnecessary on modern digital cameras and glass
Today’s cameras and many coated optics already reject much ultraviolet, so routine use is often redundant. Even high-end glass can show artifacts in aggressive lighting when an extra filter sits on the front.
- Key takeaway: use a hood as a first defense and remove the filter in night or backlit scenarios.
| Risk | Impact | When to avoid |
|---|---|---|
| Flare / ghosting | Lower contrast, visible artifacts | City night, stage lighting, backlit sunsets |
| Vignetting | Darkened corners, edge softening | Wide-angle + stacked filters |
| Unnecessary filtration | No real clarity benefit | Most daytime shooting on modern cameras |
Real-world image quality impact: sharpness, contrast, and color
Small changes in the optical chain can nudge final image sharpness more than you expect. That shift shows up as reduced micro-contrast, which makes textures and fine edges look flatter and less defined.
Micro-contrast and telephoto sensitivity
When you use long focal lengths, tiny imperfections are magnified. Cheap filters often reduce resolution and contrast most noticeably on telephoto setups. In high-res crops the softening becomes obvious even if full-frame prints look similar.
Filter construction matters
Premium optical glass with multi-coatings and nano/AR layers raises transmission and cuts reflections. High-quality pieces preserve clarity and minimize color shifts.
Cheap coatings can introduce subtle color casts and more flare. Cleanliness is crucial: dust, fingerprints, or salt films on a filter reduce clarity and raise the chance of glare.
- Micro-contrast loss makes images appear flatter.
- Telephoto use magnifies small defects.
- Quality glass plus coatings reduces impact but cannot remove it entirely.
- Do controlled A/B tests with your camera to measure changes.
| Factor | Impact | Action |
|---|---|---|
| Cheap filter | Lower resolution, more flare | Avoid on critical shoots |
| Premium filter | High transmission, low reflections | Use for protection when needed |
| Dirty surface | Reduced clarity, color shifts | Clean regularly |
Bottom line: premium filters minimize image quality loss, but remove the piece for critical work where every line of resolution matters. Balance protection against any slight trade-off depending on your assignment.
When to use a UV filter and when to skip it
A simple decision rule: if the environment threatens the front element, favor protection; if the scene risks image purity, remove the extra glass.
High-risk environments where a filter earns its keep include blowing sand, beach spray, dusty trails, deserts, and muddy travel. Use a filter as a sacrificial barrier when hiking through brush or shooting at windy sidelines.
Night and bright-point scenarios
Skip the filter for night shoots, long exposures, or city frames with many point lights. Flat glass increases reflections and flare, which can wreck contrast and highlight detail.
Mountains, haze, and distant scenes
In humid or high-altitude landscapes, test shots can show a modest haze reduction. Try A/B comparisons to weigh distance clarity against flare risk before committing.
Studio and controlled indoor work
In a studio, careful handling and a hood usually beat adding glass. Rely on cleaning, a hood, and protective caps rather than stacking filters during critical shoots.
- Keep a small filter case for quick on/off swaps as conditions change.
- Pair a filter with a hood outdoors for maximum front-end protection.
- Plan ahead: anticipate conditions and decide your approach before you head out.
- Prioritize clarity on client-critical frames; use filters when protection matters most.
| Situation | Action | Why |
|---|---|---|
| Beaches, deserts, dusty trails | Use filter + hood | Protection against sand, dust, and spray |
| Night city, long exposures | Remove filter | Minimize flare and ghosting |
| Mountain haze testing | Test on/off | Check distance clarity vs flare |
Bottom line: use filters when conditions warrant and skip them when image purity matters most. Carry a case, plan your swaps, and let the shooting environment drive the choice.
Buying and using a UV filter the right way
A quality filter should be an unobtrusive accessory you trust in the field. Start by matching the exact thread size of your camera lens and verify a flat, secure fit. A mismatched ring can cross-thread or sit unevenly and cause light issues.
Choose quality: standards, size, and brands
Prioritize optical quality. Look for optical glass with multi-coatings or nano/AR layers and high transmission. Buy from known makers such as Hoya, B+W, Kase, PolarPro, H&Y, LEE, ZEISS, or Tiffen.
Care and maintenance
Clean safely: blow off grit first to avoid grinding particles. Then use proper solution and a microfiber cloth. Store filters in hard cases or magnetic sleeves to prevent scratches and smudges.
Hood vs protective glass
A hood gives rim protection without extra glass. Use a hood as your default; add a filter when the environment threatens the front element or you need quick field swaps.
- Match thread size to avoid cross-threading.
- Avoid stacking with circular polarizers or ND on wide angles to prevent vignetting.
- Consider coatings that repel water and oil for easier cleaning in the field.
- Treat filters as kit accessories—ready to deploy when conditions demand protection.
| Consideration | Why it matters | Action |
|---|---|---|
| Optical quality | Preserves contrast and sharpness | Choose multi-coated, high-transmission glass |
| Thread size | Ensures proper seating and no light leaks | Verify thread marked on the camera lens and label your gear |
| Cleaning & storage | Prevents scratches and smudges | Blow, then wipe; store in protective case |
| Hood vs filter | Protection without extra reflective surfaces | Use a hood daily; add a filter when rough conditions demand |
UV Lens Does What For Photos: quick, practical takeaways
Practical habits save shots: choose protection only when the scene demands it. Make the hood your daily default; it shields the front lens area and boosts contrast without adding glass.
Default rules and quick actions
- Use a hood for everyday work; it reduces stray light and helps image clarity.
- Add a filter only in harsh shooting conditions like sand, sea-spray, or dusty travel where the protection lens benefit matters.
- Remove the filter at night or near bright point lights to avoid flare and ghosting that ruin contrast.
- Expect any clarity gains to be subtle and scene-dependent, not universal.
- Keep a spare in a case so you can swap quickly and save key shots.
- Let the assignment, not habit, decide whether you use filter protection that day.
| Situation | Action | Why |
|---|---|---|
| Beach or dusty trails | Keep filter on | Protects front lens from damage and constant cleaning |
| Night city or bright points | Remove filter | Prevents flare and preserves contrast |
| Everyday shooting | Use hood | Protection without extra glass |
If you’re unsure, run a few quick A/B shots in your typical locations. That simple test will show the real pros cons and confirm whether a filter helps your camera and workflow. Learn more about protecting your gear at protecting your gear.
Conclusion
Practical choices—carry protection or remove it—drive better results than habit alone. Photographers should prioritize image quality when deciding whether to mount a filter. On most modern cameras the optical gain from blocking ultraviolet light is modest; the real value is in lens protection during rough work.
Use a filter as a sacrificial shield in sandy, salty, or dusty conditions. Remove the filter at night or with bright point lights to keep contrast and clarity high.
Invest in quality accessories and pair a hood with careful handling as your daily defense. Test your gear in common conditions so your future choices match real results, and follow the brand and maintenance tips above to protect equipment and preserve your images.
FAQ
What does a UV protective filter do to my images?
It adds a thin piece of optical glass in front of the camera element that blocks some ultraviolet energy and keeps dust, fingerprints, and scratches off the expensive front element. On older film cameras it reduced bluish haze; on modern digital sensors the visible effect is much smaller. The main practical benefit today is physical protection and easier cleaning, while any image clarity gains depend on scene conditions and filter quality.
Do these filters still matter on modern digital cameras?
Many digital sensors and lens coatings already cut ultraviolet light, so the visible impact is often negligible. Photographers still use a filter mainly for protection in harsh environments. Choose one selectively when shooting at the beach, in dusty areas, or when you can’t replace a damaged lens quickly.
How does adding an extra piece of glass change light and image quality?
Any additional element can introduce reflections, flare, and tiny shifts in contrast. High-quality optical glass with multi-coatings minimizes these issues, but lower-grade filters may reduce sharpness, lower micro-contrast, or create ghosting around bright highlights.
When will a protective filter actually improve clarity?
In distant, humid, or high-UV conditions—such as mountain ranges, coastal haze, or early morning scenes—a good filter can slightly reduce bluish veil and improve perceived clarity. Results vary by weather, lens design, and the filter’s transmission characteristics.
What are the main downsides of leaving a filter on all the time?
The biggest risks are flare and ghosting with backlit scenes or night shots, potential vignetting on wide-angle lenses, and slight losses in micro-contrast. Stacking multiple filters increases those risks. For controlled studio work or night photography, skipping the filter often yields cleaner results.
How does filter construction affect performance?
Optical-grade glass, precision polishing, and robust multi-coatings (anti-reflective and water/oil repellent layers) matter most. Cheap float glass or poorly bonded coatings are likelier to cause reflections, lower resolution, and attract smudges that are hard to remove.
When should I keep a filter on my gear?
Keep it on in dusty deserts, on windy beaches, during hikes through brush, or when traveling without a chance for quick repairs. It’s a simple safeguard against sand, sea spray, and accidental bumps that could otherwise require costly repairs or replacement.
When should I remove the filter before shooting?
Remove it for night cityscapes, starfields, long exposures, or any situation with strong backlighting where flare and ghosting will degrade the image. Also skip it for critical studio work when you can control the environment and protect the front element by other means.
How should I choose a filter if I decide to buy one?
Pick reputable brands that publish optical specs, match the correct thread size, and offer high-transmission glass with multi-coated surfaces. Look for slim or low-profile rings for wide-angle lenses to avoid vignetting, and consider filters with water- and oil-repellent coatings for easier cleaning.
How do I care for and maintain a protective filter?
Store filters in a padded case, use a blower and a microfiber cloth for cleaning, and apply gentle, circular motions with approved cleaners. Avoid abrasive materials and tighten the ring carefully to prevent cross-threading. Replace the filter if it gets deeply scratched or delaminated.
Is a lens hood a better option than a protective filter?
A hood blocks stray light and prevents many types of impact without adding extra glass, so it’s often the better first choice for image quality. Use a hood plus a filter only when you need both flare control and physical front-element protection.
Will using a filter affect resale value or long-term care of my gear?
A filter can preserve the front element from nicks and scratches, helping maintain resale condition. Replacing a scratched, cheap filter is far cheaper than repairing or replacing premium glass, so many photographers view it as a prudent insurance move.
Are there specific shooting scenarios where testing a filter is recommended?
Yes. Try side-by-side comparisons during dawn/dusk haze, bright coastal scenes, and long-distance landscapes to judge clarity gains. Also test for flare by photographing bright points of light and night scenes to ensure the filter won’t introduce unacceptable artifacts.
Can using a filter affect sharpness on telephoto or high-resolution setups?
On long focal lengths and high-megapixel sensors, any slight degradation becomes more visible. Quality optics help, but serious landscape or telephoto shooters often test carefully or shoot without a filter when absolute resolution and micro-contrast matter most.
Quick practical takeaway: should I default to using a filter?
Default to a lens hood for general use and add a high-quality protective filter only when conditions demand physical protection or when tests show a clarity benefit. Avoid cheap filters and remove them for critical low-light or high-contrast work.


